
 Batten Blooms
Preparing a bed
Most garden problems start in the soil, and most of them are cheaper to fix before anything is planted. This guide covers what soil is, how to test it and read the result, drainage, clearing grass without a tiller, building raised beds, feeding the bed with compost and leaves, and keeping the weeds from coming back.
When each job goes, timed to your frost dates
Fall is the best time to start a new bed, because the weather and the winter do much of the work. Spring is for building, mulching, and getting ahead of weeds. Add your ZIP to turn every step into your own months and see which one is open now.
Every step counts from your last spring frost or your first fall frost, so the right week here is a different week elsewhere.
Check drainage after the thaw
4–8 weeks before last frost
Run the hole test while the soil is naturally wet, so you see how the bed behaves in its worst week, not its best. Mark anywhere water is still sitting a day after rain.
Build and fill raised beds
2–6 weeks before last frost
Order soil early; bulk deliveries slow down once everyone starts at once. Fill, water it in, and let it settle a week before planting.
Top-dress with compost, then mulch
0–4 weeks before last frost
An inch or two of compost on the surface, then mulch over it. No digging in. Mulch is your main weed control for the season, so lay it before the first flush of seedlings.
Start weeding, and keep at it
1–6 weeks after last frost
The first six weeks decide the summer. Ten minutes every few days beats one long Saturday, and a weed pulled at the seedling stage takes no effort at all.
Tarp or solarize grass (summer option)
6–14 weeks after last frost
Mow low, cover, and weight the edges. Black tarp takes six to eight weeks in warm weather; clear plastic only works in strong, hot sun. Lift a corner to check that nothing green is left.
Cut weeds before they set seed
8–14 weeks before first frost
Late-summer weeds that go to seed are next year's work. Cut or pull anything flowering, even if you can't deal with the roots yet.
Sheet-mulch lawn for next spring
2–8 weeks before first frost
The best window for killing grass. Cardboard and mulch go down now, and fall rain and winter decomposition do the work, leaving a soft, planting-ready bed by spring.
Send in the soil sample
0–6 weeks before first frost
Labs are quieter in fall and results come back in time to act. Lime and sulfur take months to work, so a fall test means the bed is ready by spring.
Apply lime or sulfur from the results
0–4 weeks after first frost
Spread what the lab recommends, no more, and water it in or let rain do it. Frost and thaw carry it down over winter.
Cover bare soil for winter
0–6 weeks after first frost
Shredded leaves, compost, or a cover crop. Bare soil loses structure to rain, and open ground is where winter weeds start.
Rock, air, water, and the things that eat dead plants
Soil is not dirt. It is a mix of minerals, organic matter, and pore space, held together by living organisms, and the point of bed prep is to improve that mix without breaking it.
What it’s made of
What soil is made of
Four things: mineral particles (sand, silt, clay), organic matter, air, and water. The air and water sit in the gaps between particles, and about half of a good soil is gap. Living organisms, mostly bacteria and fungi, are a tiny fraction of the weight and do most of the work.
Know your texture
Texture is the mix of sand, silt, and clay, and you can't change it much. Squeeze a damp handful: if it falls apart it is sandy; if it holds a shape and rolls into a ribbon longer than an inch or two it is clay. Or fill a jar a third full of soil, top with water, shake, and let it settle. Sand drops in a minute, silt within hours, clay over a day.
Structure is the part you build
Structure is how particles clump into crumbs. Crumbs are held together by fungal threads and the sticky by-products of microbes, which is why healthy soil breaks into small, loose pieces and compacted soil comes up in slabs. Structure is what lets roots, air, and water move, and organic matter is what builds it.
Organic matter is the lever
A few percent organic matter changes how a soil behaves. In sand it holds water and nutrients; in clay it opens the soil up for drainage. Most garden soil is in the low single digits. Compost, leaf mold, and mulch are the way up.
How it breaks down
Who does the breaking down
Worms, pill bugs, millipedes, and beetle larvae shred dead plant material first. Bacteria and fungi finish it, digesting what's left and releasing nutrients a little at a time. What remains at the end is humus, dark and stable, which can persist in soil for decades.
Browns and greens
Browns (dry leaves, wood chips, cardboard, straw) are mostly carbon and break down slowly. Greens (grass clippings, kitchen scraps, fresh weeds) are rich in nitrogen and break down fast. Decomposers need both. All browns sits for years; all greens turns to slime.
Why mulch rots from the bottom
Decomposition happens where the mulch touches the soil, because that's where the organisms and the moisture are. Wood chips left on the surface feed the soil slowly and don't rob nitrogen from your plants. Digging fresh wood chips in does, for a season. Mulch on top, never mixed in.
Warmth and moisture set the pace
Decomposition speeds up in warm, damp conditions and almost stops in cold or dry ones. That is why sheet mulch laid in fall works over winter and spring, and why a compost pile that has dried out simply sits there.
Feed the soil by covering it
The gardener's job is mostly to keep a layer of organic material on top and leave it alone. Leave leaves where you can. Add an inch or two of compost a year. Skip rototilling: it burns through organic matter, breaks up fungal networks, and brings buried weed seeds up to the light.
Test first, then amend
You can’t tell soil pH or nutrient levels by looking, and the wrong amendment does harm. A lab test costs little and tells you exactly what the bed needs.
Reading pH
What pH does
pH is a scale from acid to alkaline, with 7 neutral. It controls which nutrients a plant can take up. Too acid or too alkaline and nutrients are in the soil but locked away, so plants yellow and stall in soil that has plenty.
The target
Most garden plants do best between 6.0 and 7.0. Vegetables and most perennials sit in that range. Blueberries want 4.5 to 5.5, and hydrangea flower colour follows it. Plants that want something different are the exception, and the plant page says so.
Raising it
Ground limestone raises pH. If the test shows low magnesium, dolomitic lime supplies both. Lime works slowly, over months, and clay soil needs far more than sand to move the same amount.
Lowering it
Elemental sulfur lowers pH as soil bacteria convert it to acid, which takes months, so apply it the season before planting. Compost and pine-based mulch help hold the change.
Go slowly
Change pH by a point or less at a time and retest the next year. Overshooting is harder to fix than undershooting. Wetter regions tend toward acid soil and drier ones toward alkaline, so what you need depends where you are.
Don't guess
Adding lime to an already neutral bed, or sulfur to an alkaline one that has plenty of buffering, wastes money and can cause problems. The test tells you which direction you're going and how far.
How to submit a soil test
Pick a lab
Your state's cooperative extension (usually through the land-grant university) runs an inexpensive lab, and its recommendations are written for local soils. Commercial labs work too. Home kits and probe meters are rough guides at best.
Gather clean tools
A stainless or plastic trowel and a clean plastic bucket. Avoid galvanized buckets, since the zinc skews results. Don't sample straight after lime, fertilizer, or compost.
Sample each area separately
Lawn, vegetable bed, and ornamental border get their own samples, since they'll need different advice. Within each area, take six to ten small scoops from different spots.
Dig to root depth
Brush off mulch and surface debris, then dig a small hole and take a slice about four to six inches deep (two to four for lawn). Drop each scoop into the bucket.
Mix and dry
Stir the scoops together, remove stones and roots, and spread a cup or so on newspaper to air-dry indoors if it's wet. Don't use heat.
Bag, label, and fill the form
Put the sample in the bag or box the lab provides and label it to match the form. Say what you're going to grow, since recommendations depend on it. Ask for pH, organic matter, and the major nutrients. Add a lead and heavy-metals test if the site is old, near a road, or near a painted building, especially if you'll grow food.
Read and act
Results arrive in one to three weeks, usually with amounts per 1,000 square feet. Apply what's recommended, then retest in two to three years.
What to add, and when it earns its place
Most amendments are either a pH fix or a feed, and only the test tells you whether you need one. Rates aren’t listed here because they depend on your soil and the product, and the lab report gives them per 1,000 square feet.
Which way to go
Soil is acid (pH below about 6.0)
Raise it if you're growing vegetables, most perennials, or lawn, which want 6.0 to 7.0. Limestone is the standard fix. Leave it alone if the plants are acid-lovers like blueberries, rhododendrons, and azaleas.
Soil is alkaline (pH above about 7.5)
Lower it only for plants that need it, such as blueberries, or when yellowing between the veins points to locked-up iron. Elemental sulfur is the lasting fix. In strongly alkaline soil, growing in raised beds or pots is often easier than fighting the ground.
Soil is in range
Don't adjust anything. Skip the lime and sulfur, and spend the effort on compost and mulch, which keep pH steady.
Plants that want acid soil
If your soil is alkaline, these need it lowered, or a raised bed or container filled with acid mix.
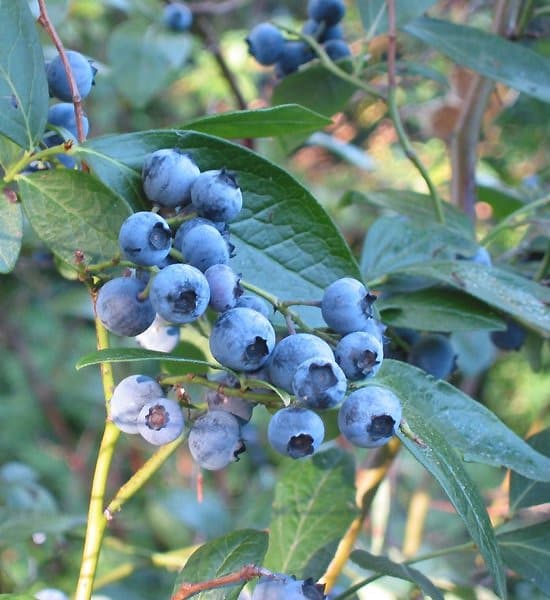
Highbush Blueberry
pH 4.5 to 5.5. Needs the soil acidified before planting if it reads above 6.
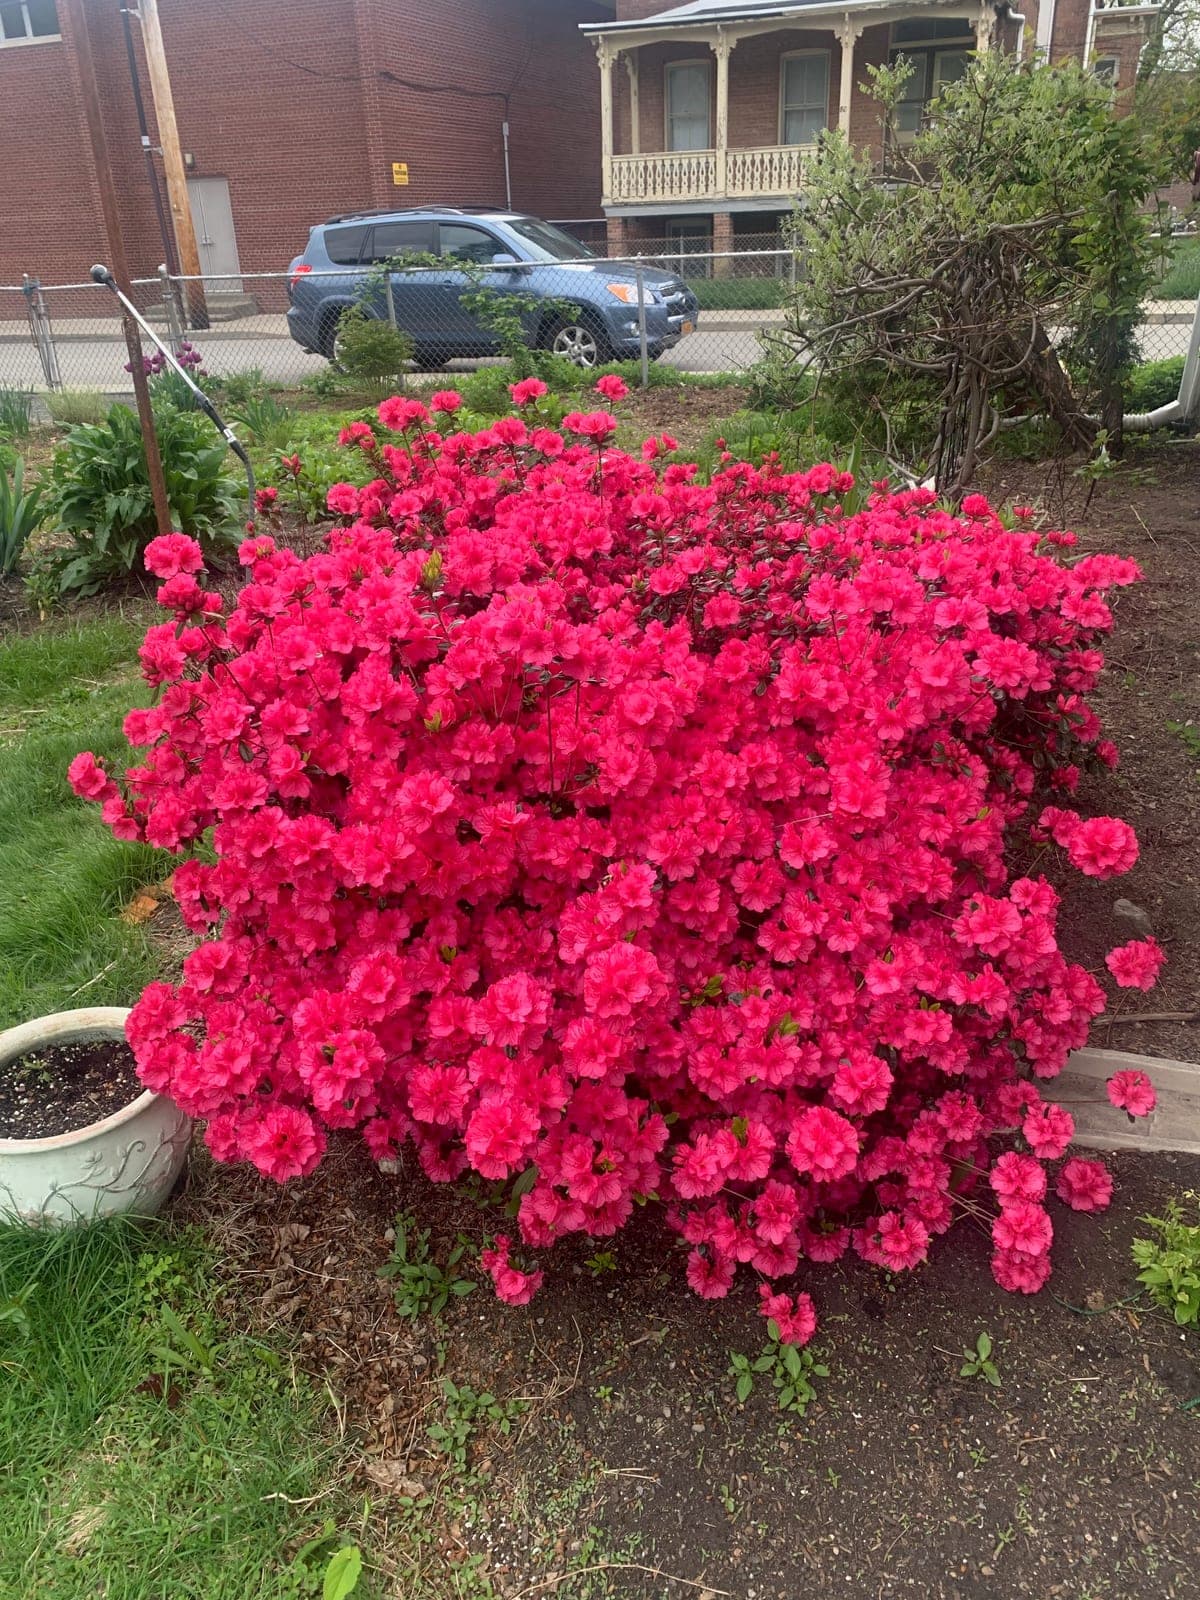
Azalea
pH 4.5 to 6.0, humus-rich and well drained. Never lime near it.
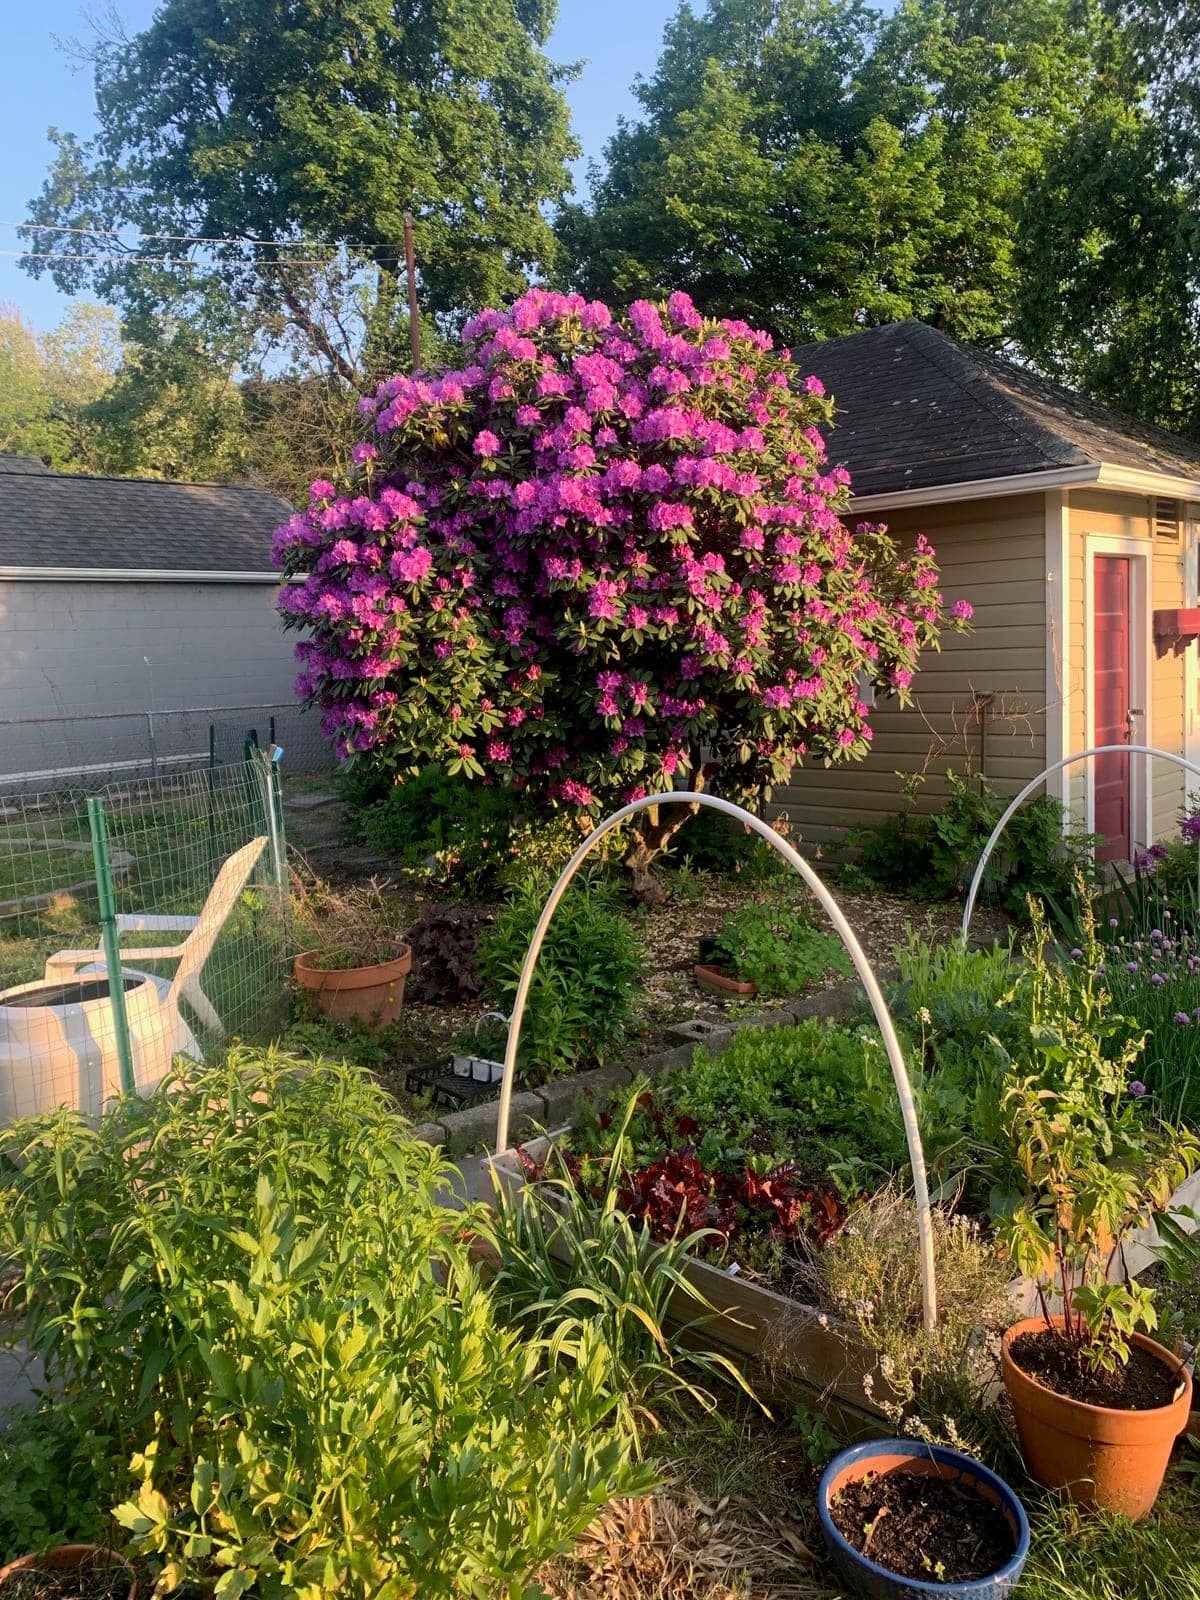
Rhododendron
pH 4.5 to 6.0 in humus-rich, well-drained soil.
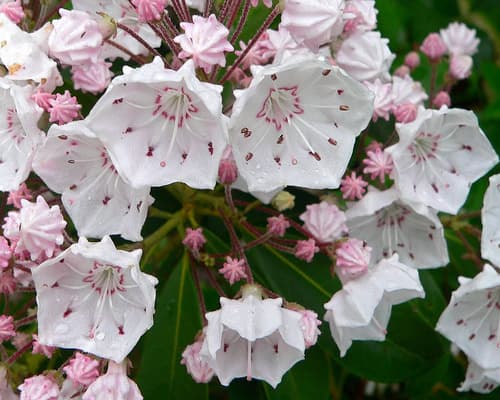
Mountain Laurel
Moist, well-drained, acid soil.

Summersweet
Moist, humus-rich, acid soil, and fine in wet spots.
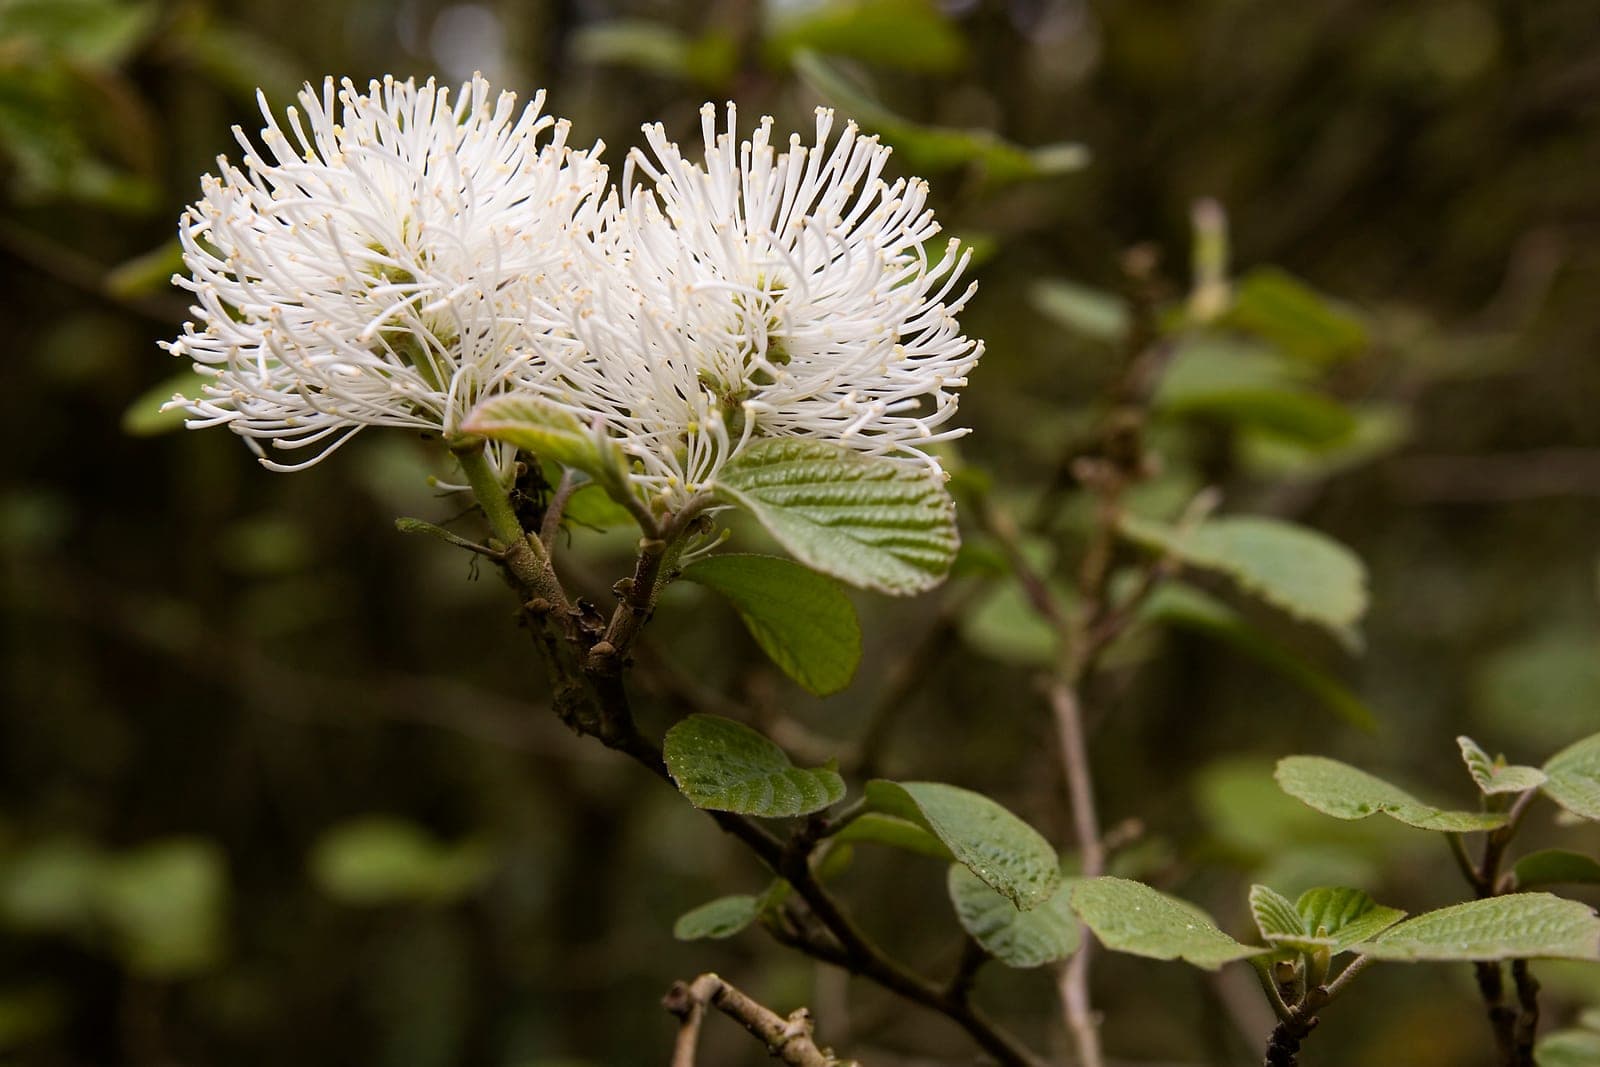
Large Fothergilla
Moist, well-drained, acid soil.
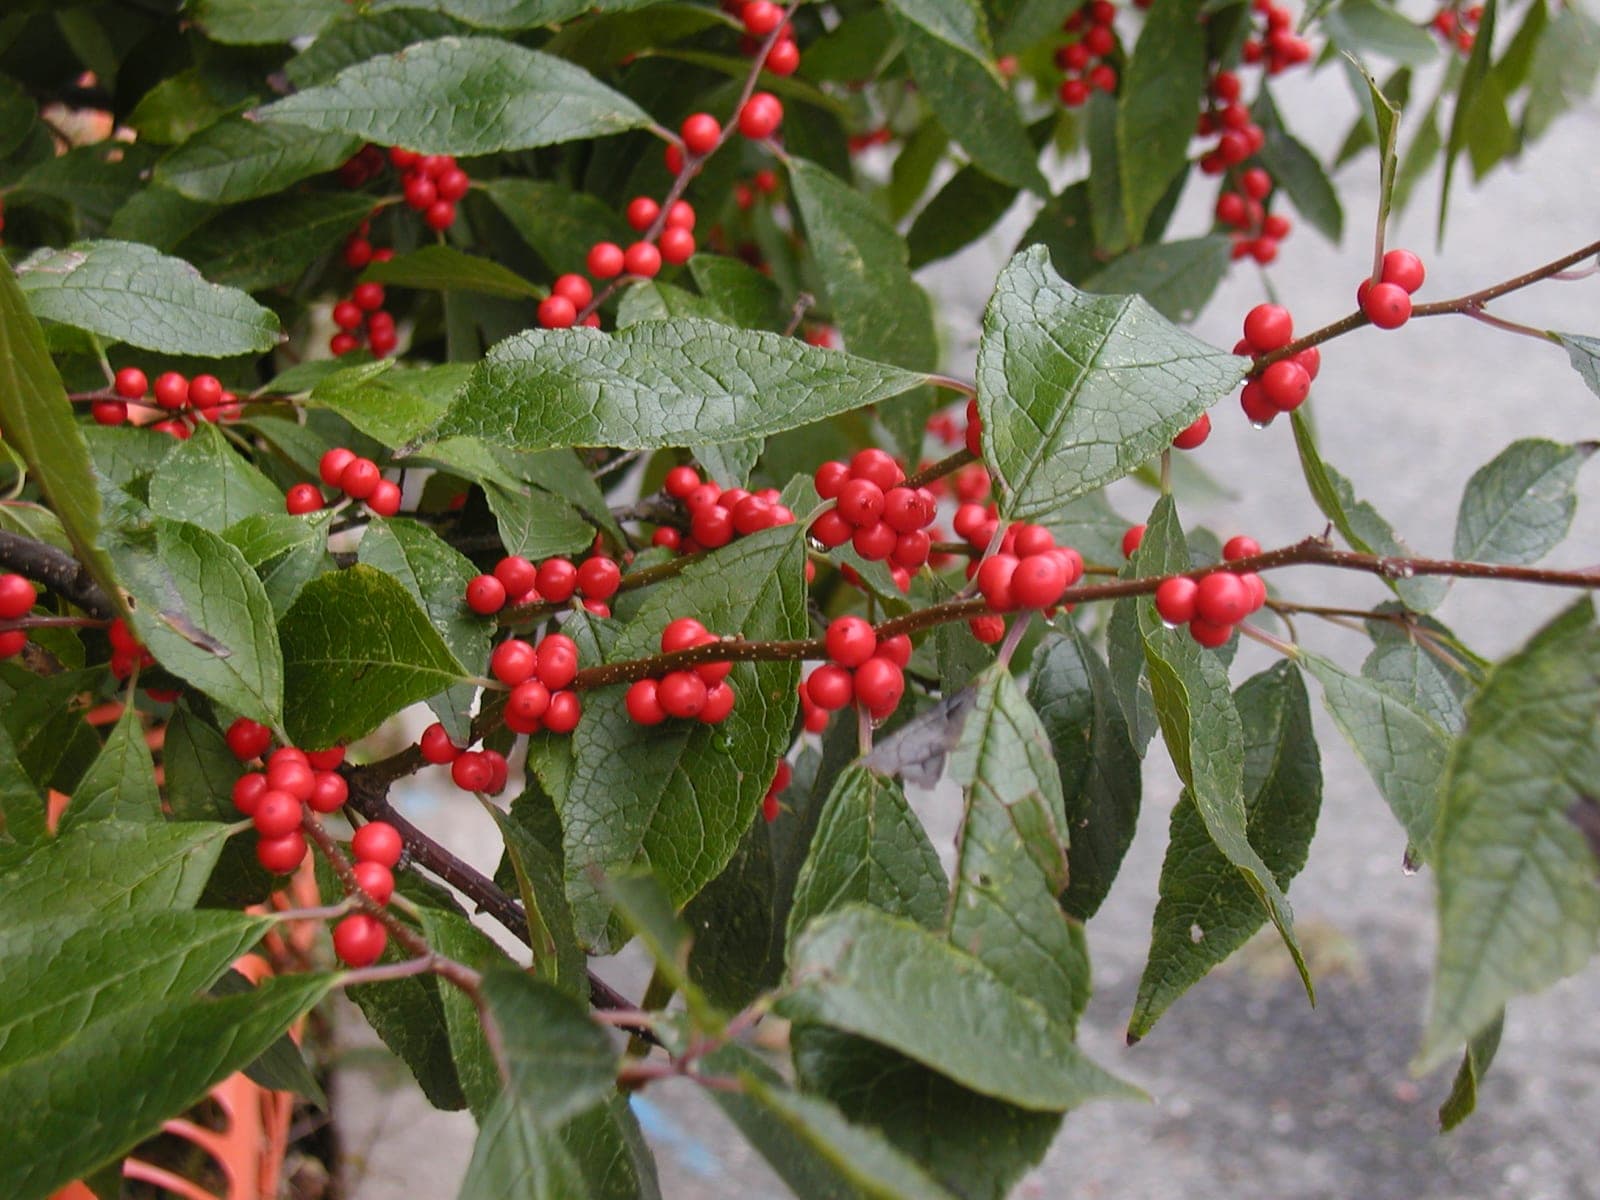
Winterberry
Acid soil, pH 4.5 to 6.5. Tolerates wet ground.
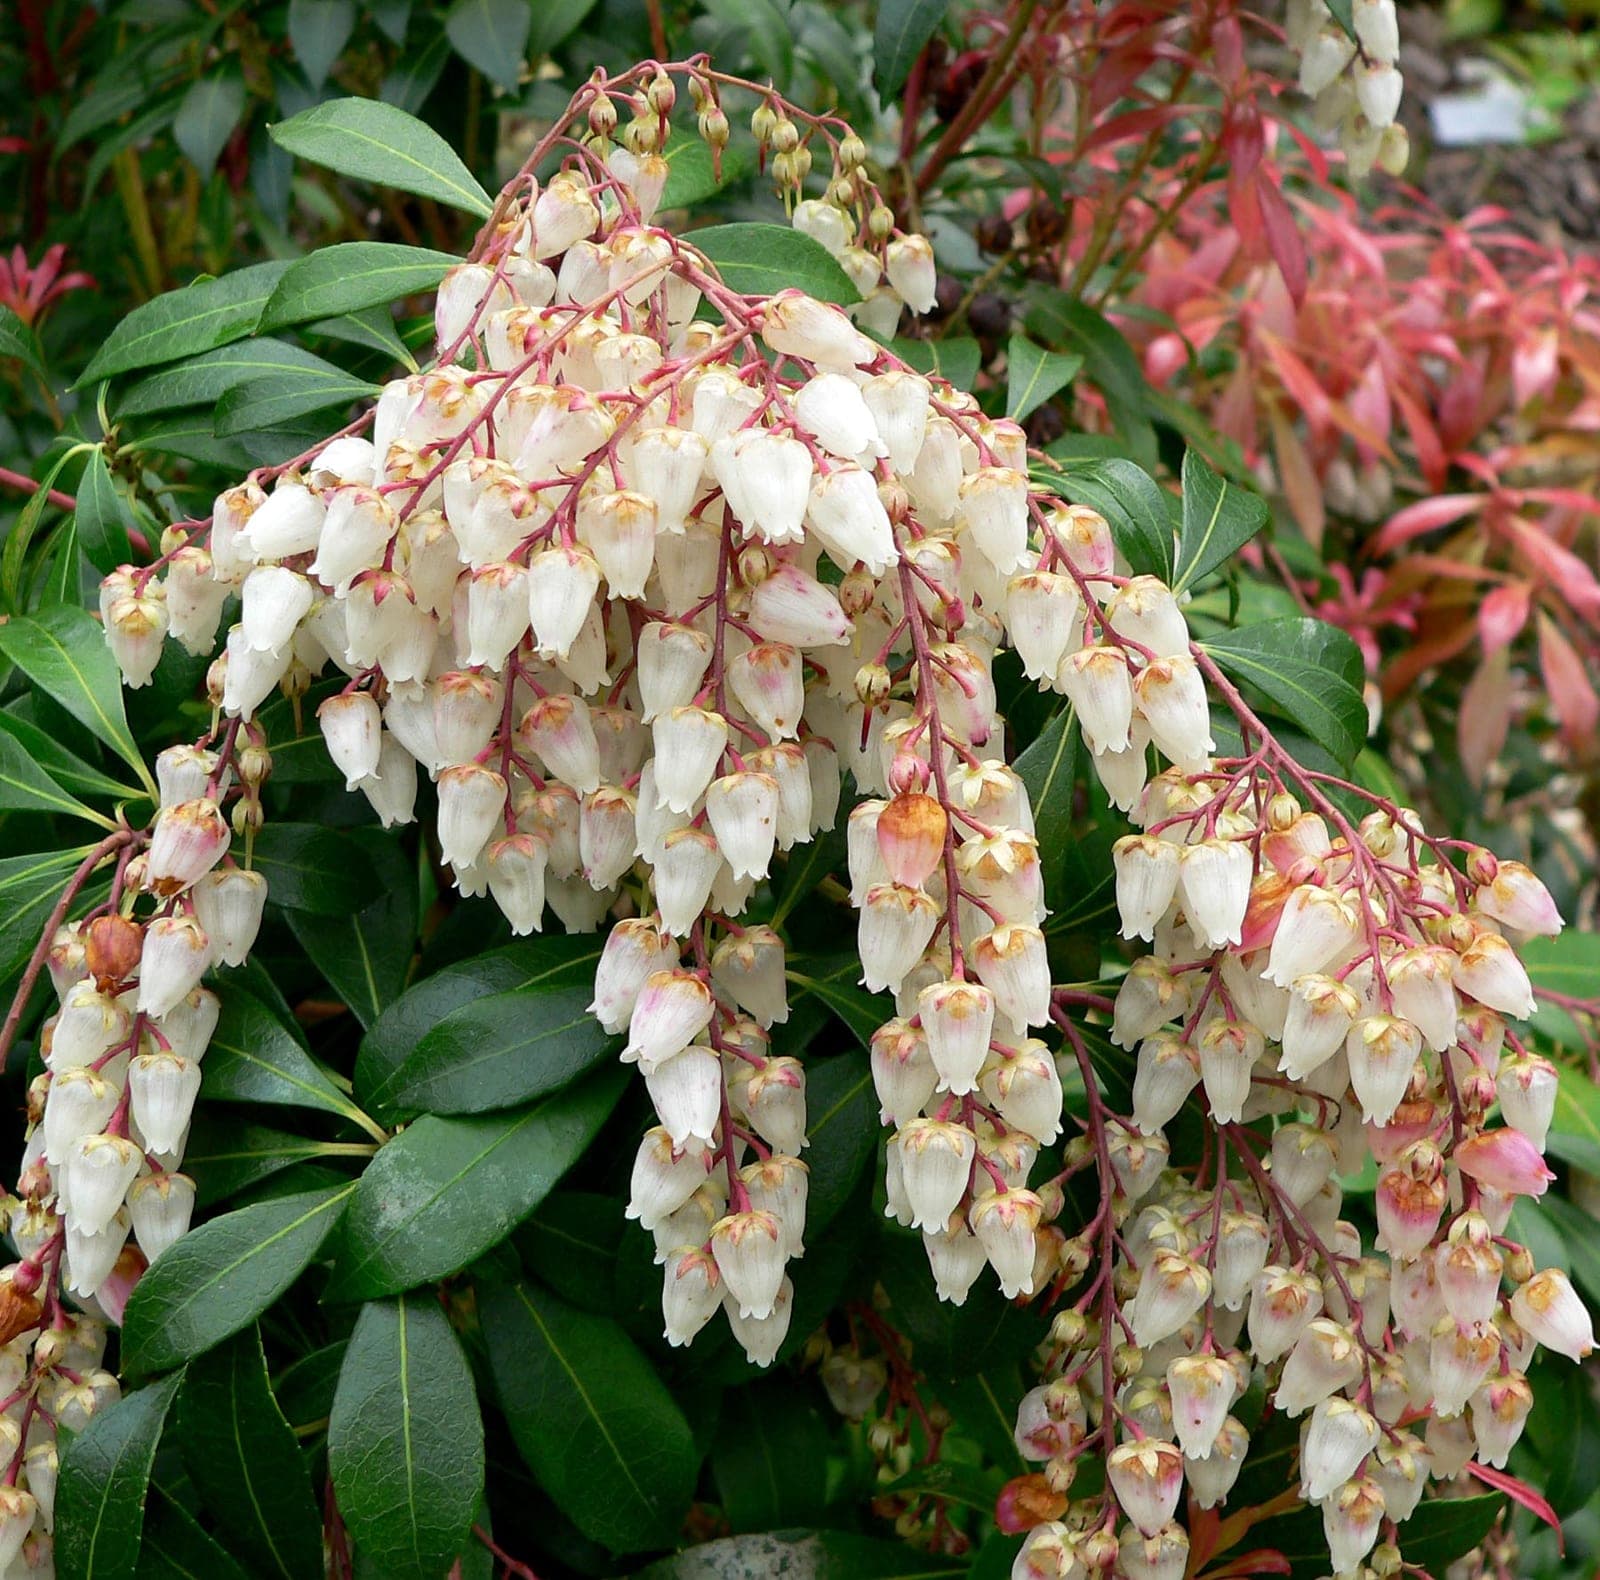
Lily-of-the-Valley Shrub (Andromeda)
Moist, well-drained, acid, humus-rich soil.
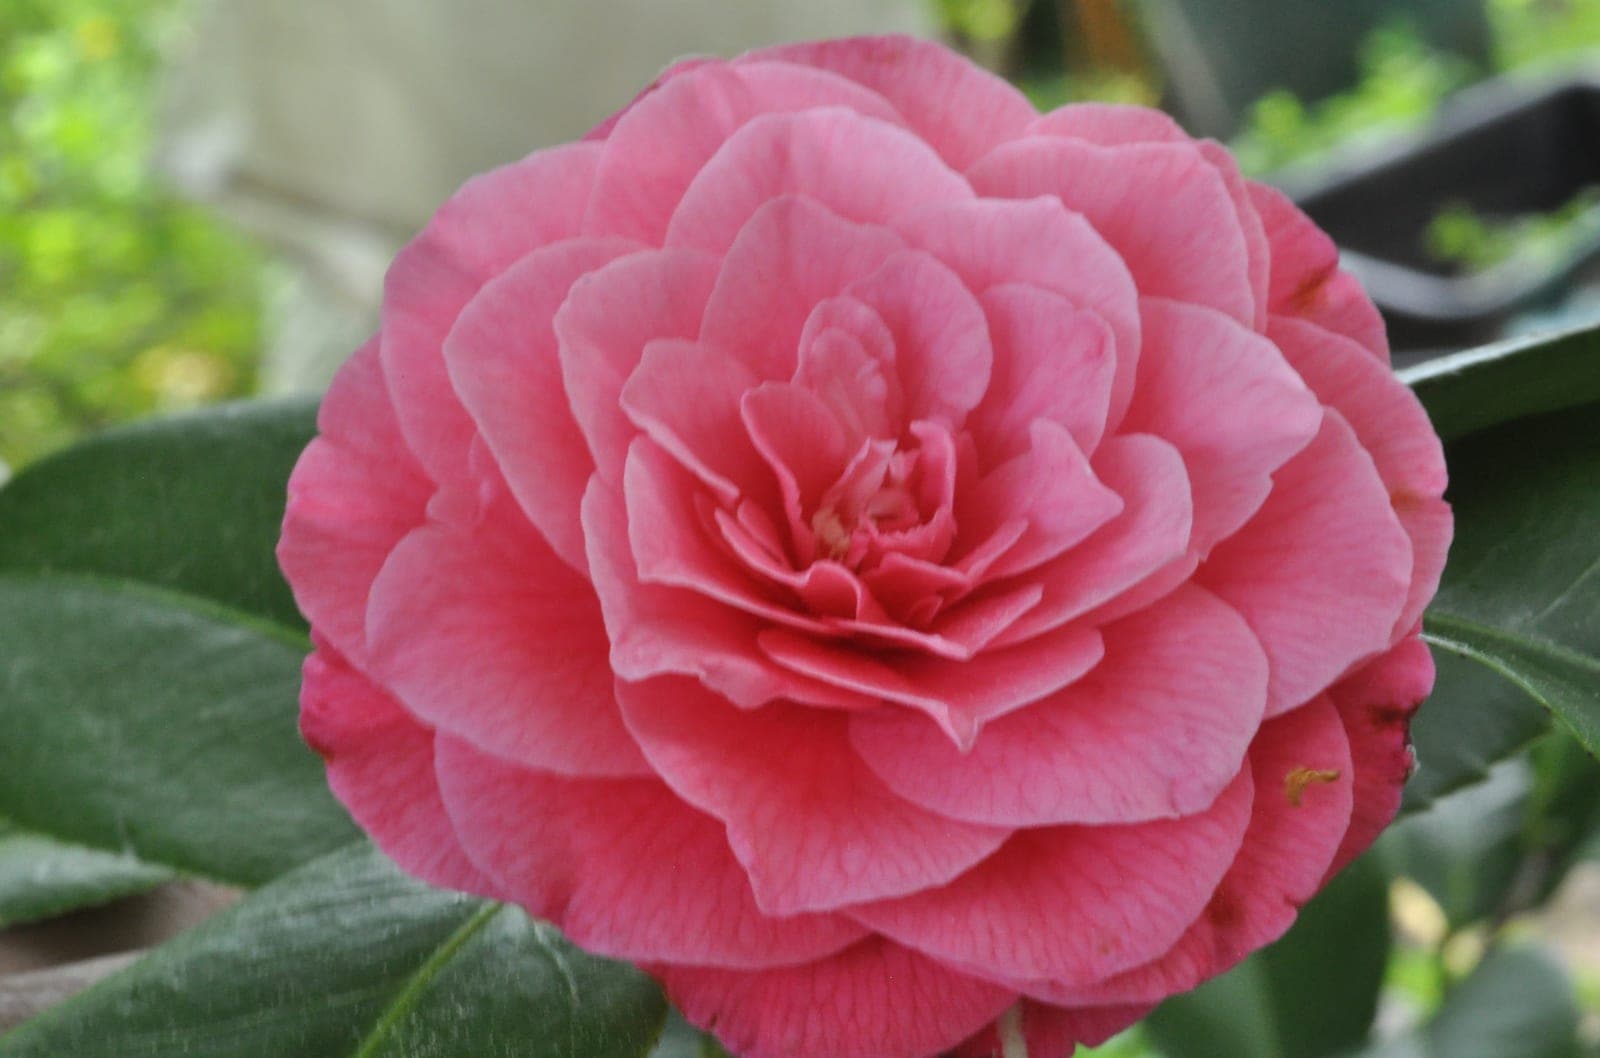
Camellia 'April Rose'
Moist, well-drained, acid soil.

Flowering Dogwood
Moist, well-drained, fertile, acid soil.
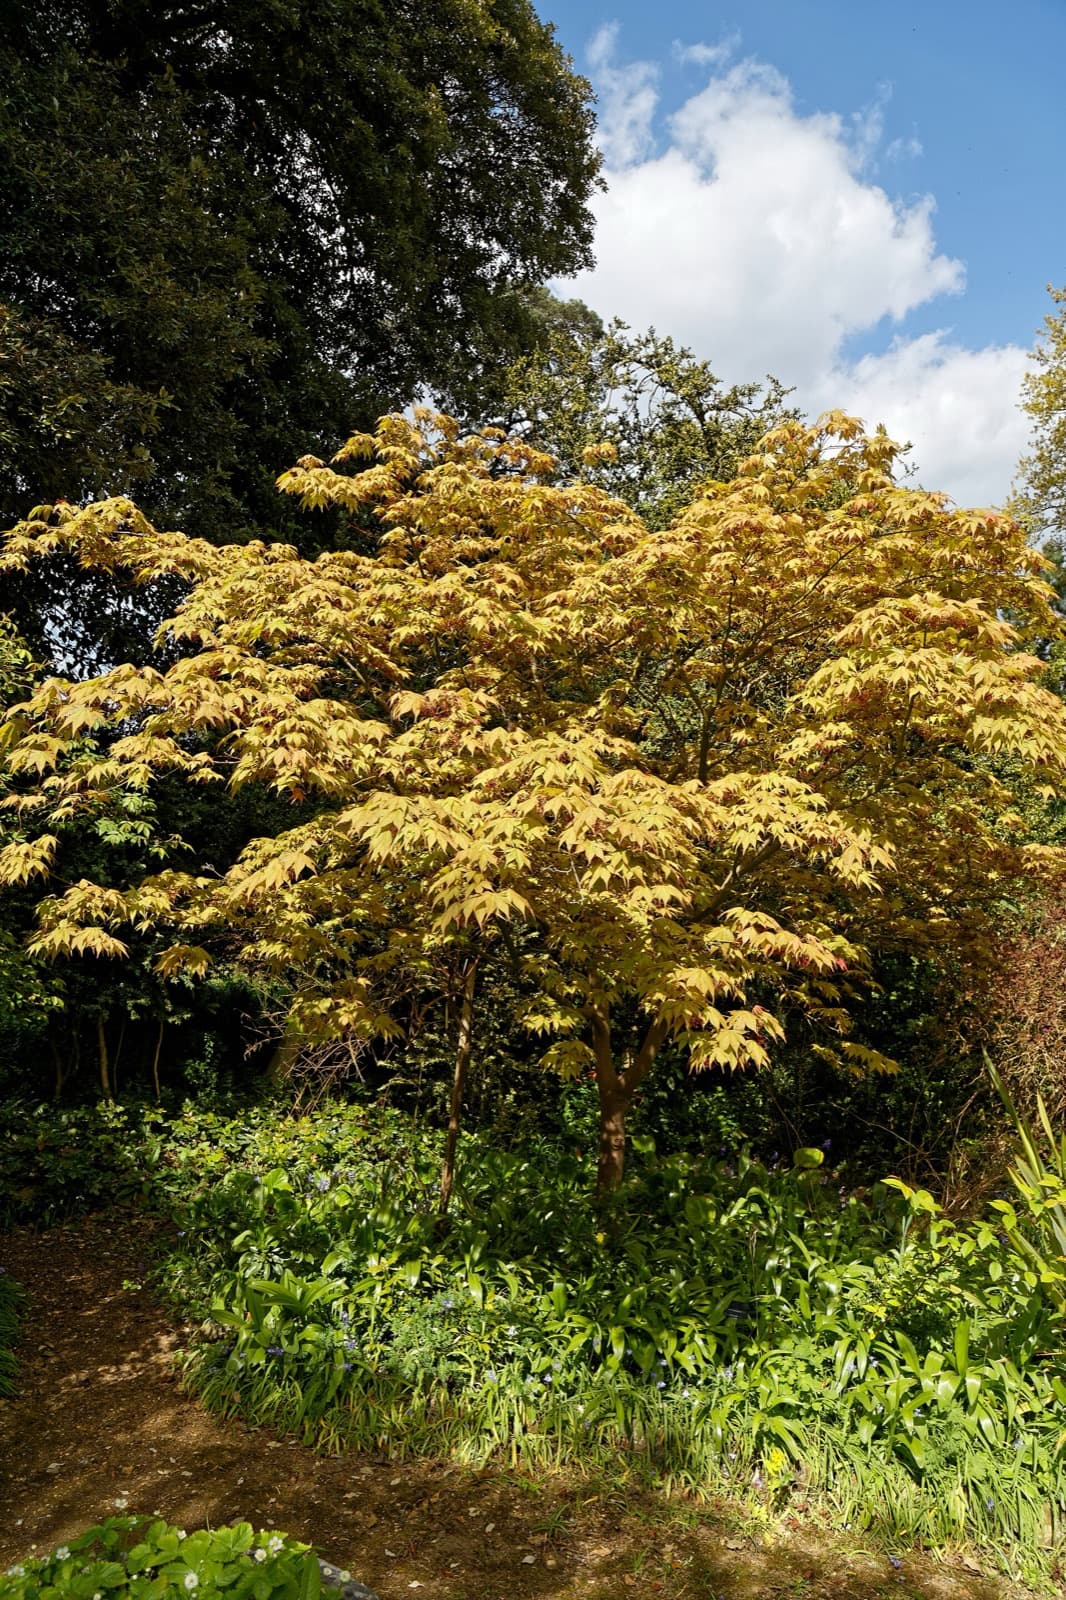
Japanese Maple
Moist, well-drained, acid soil.

Potato
Slightly acid, pH 5.0 to 6.0. Avoid freshly limed soil, which invites scab.
Plants that want alkaline soil
If your soil is acid, these need lime, or a raised bed with a sweeter mix.
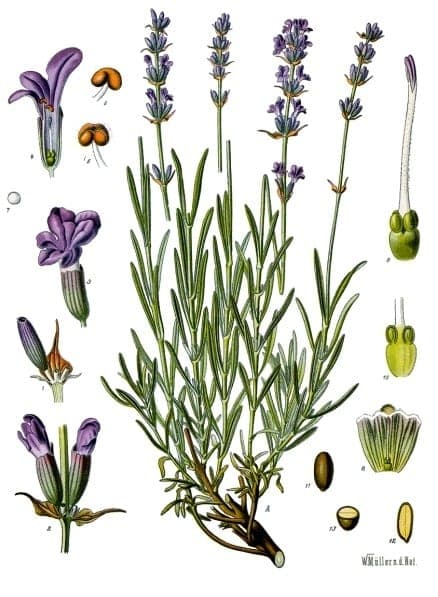
English Lavender
Alkaline preferred, and lean and well drained. Good in gravel or a raised bed.

Rosemary
Sandy, alkaline, sharply drained. Poor drainage kills it faster than anything.
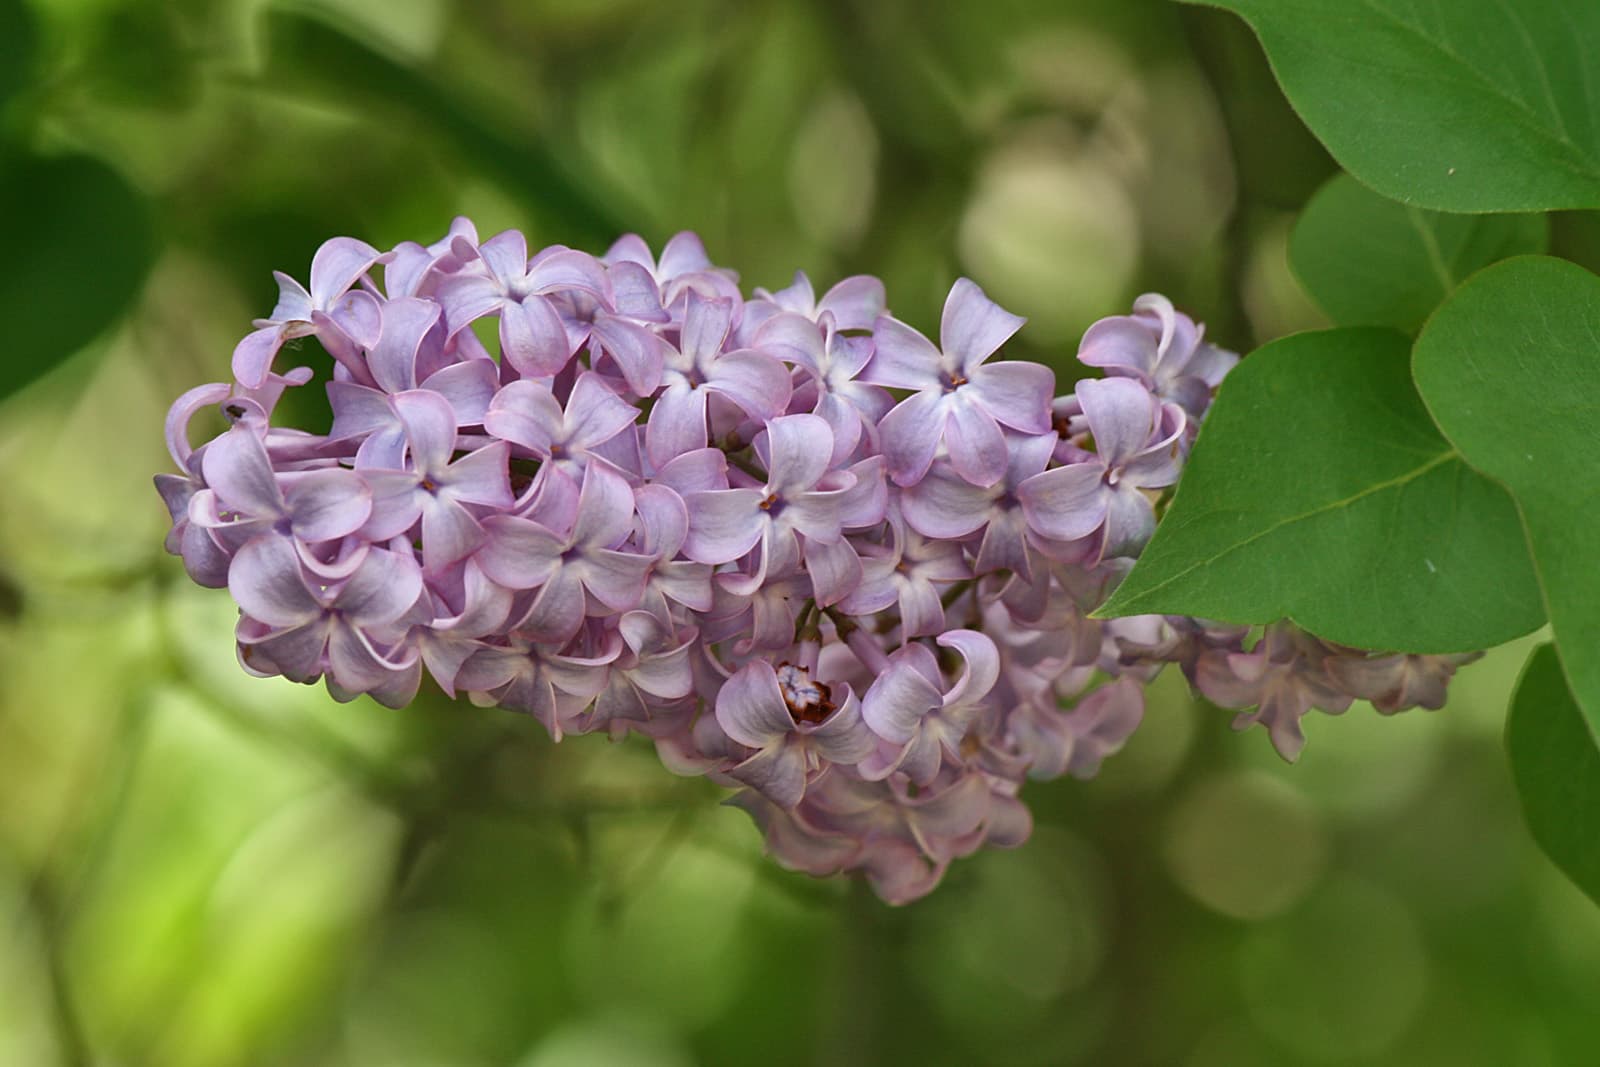
Common Lilac
Well-drained, neutral to alkaline soil.
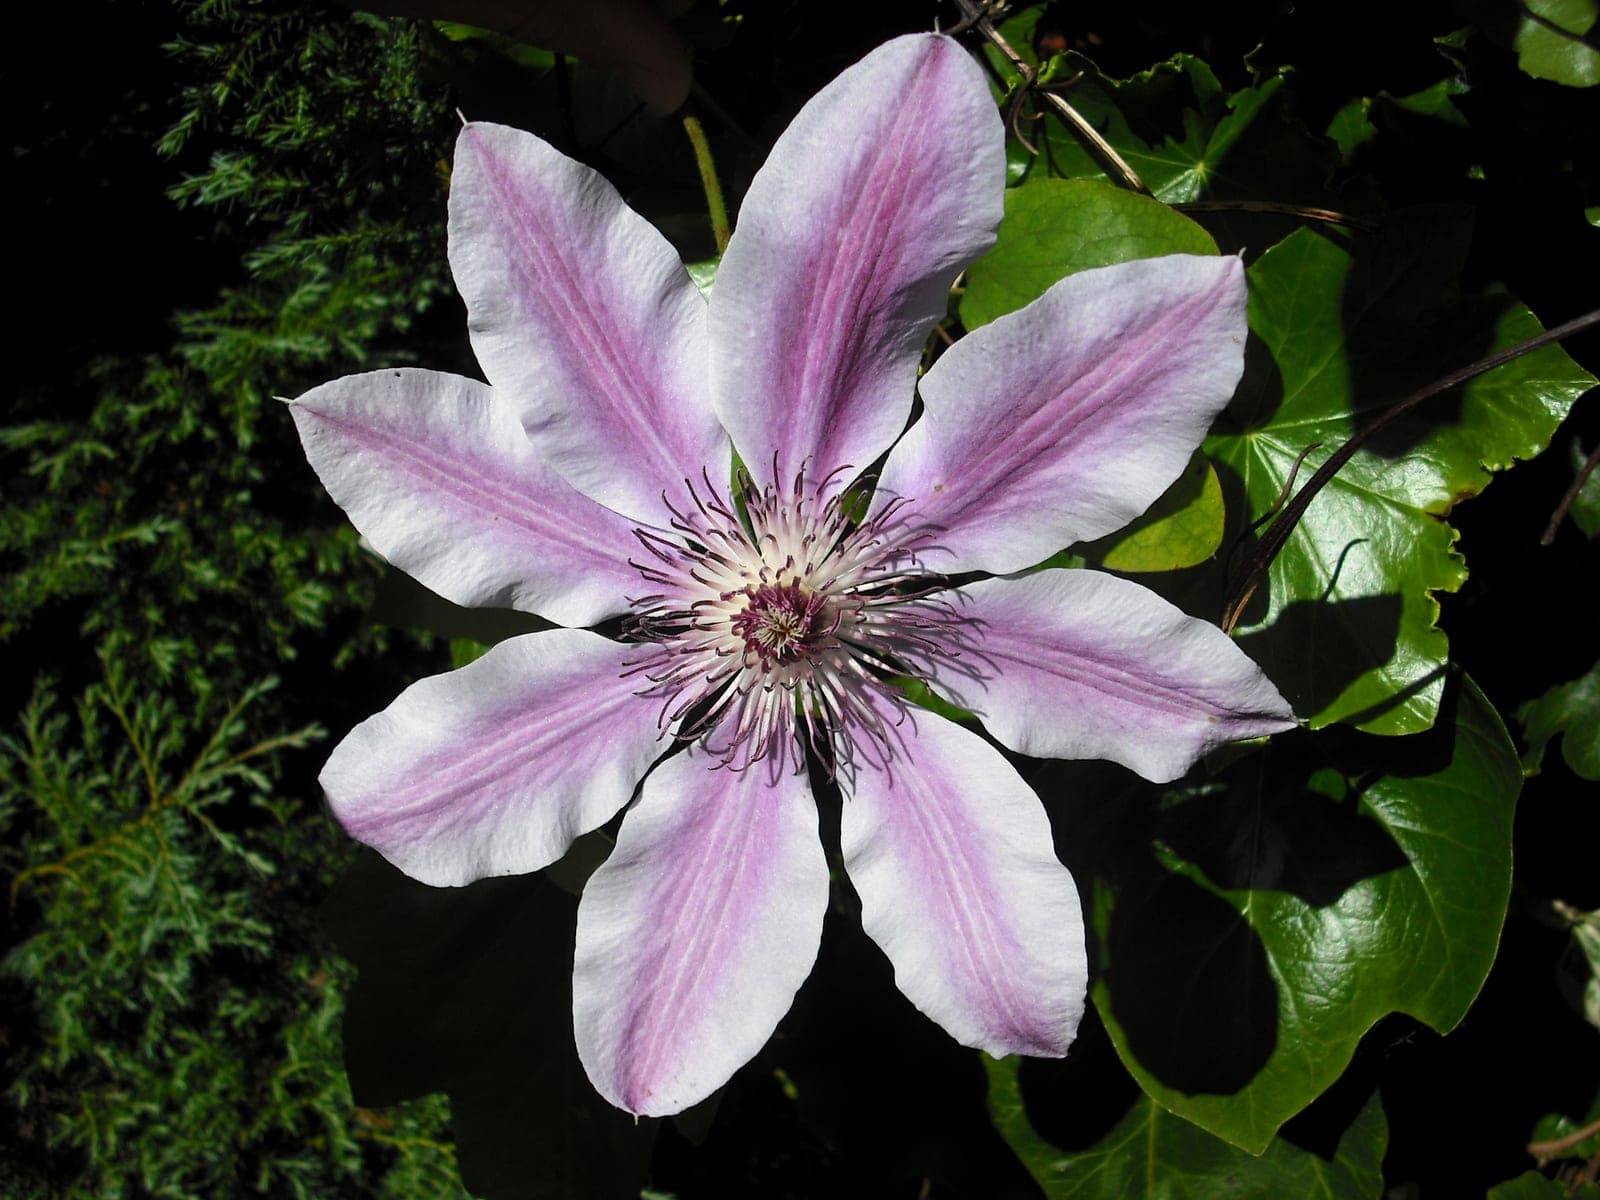
Clematis
Slightly alkaline and rich. Add lime if the soil is acid.
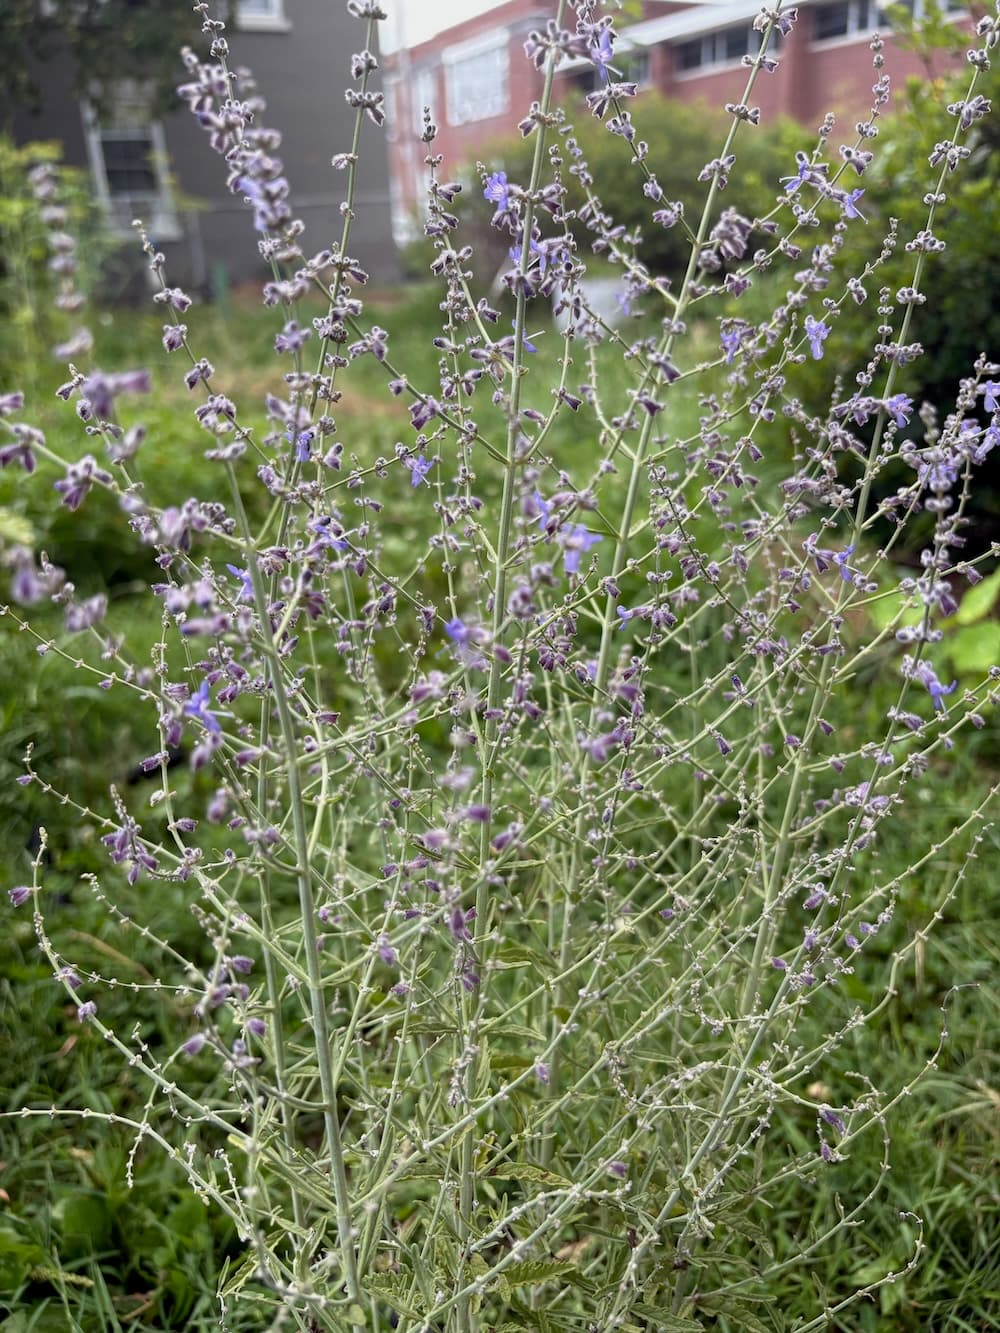
Russian Sage
Lean, well drained, and tolerant of alkaline soil.

Greek Oregano
Poor to average, well-drained, slightly alkaline soil.

Lemon Thyme
Poor to average, well-drained, slightly alkaline soil.
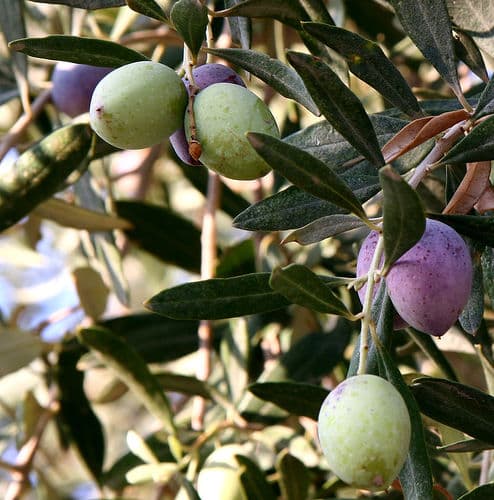
Olive
Sandy or rocky, well drained, and tolerant of alkaline soil.
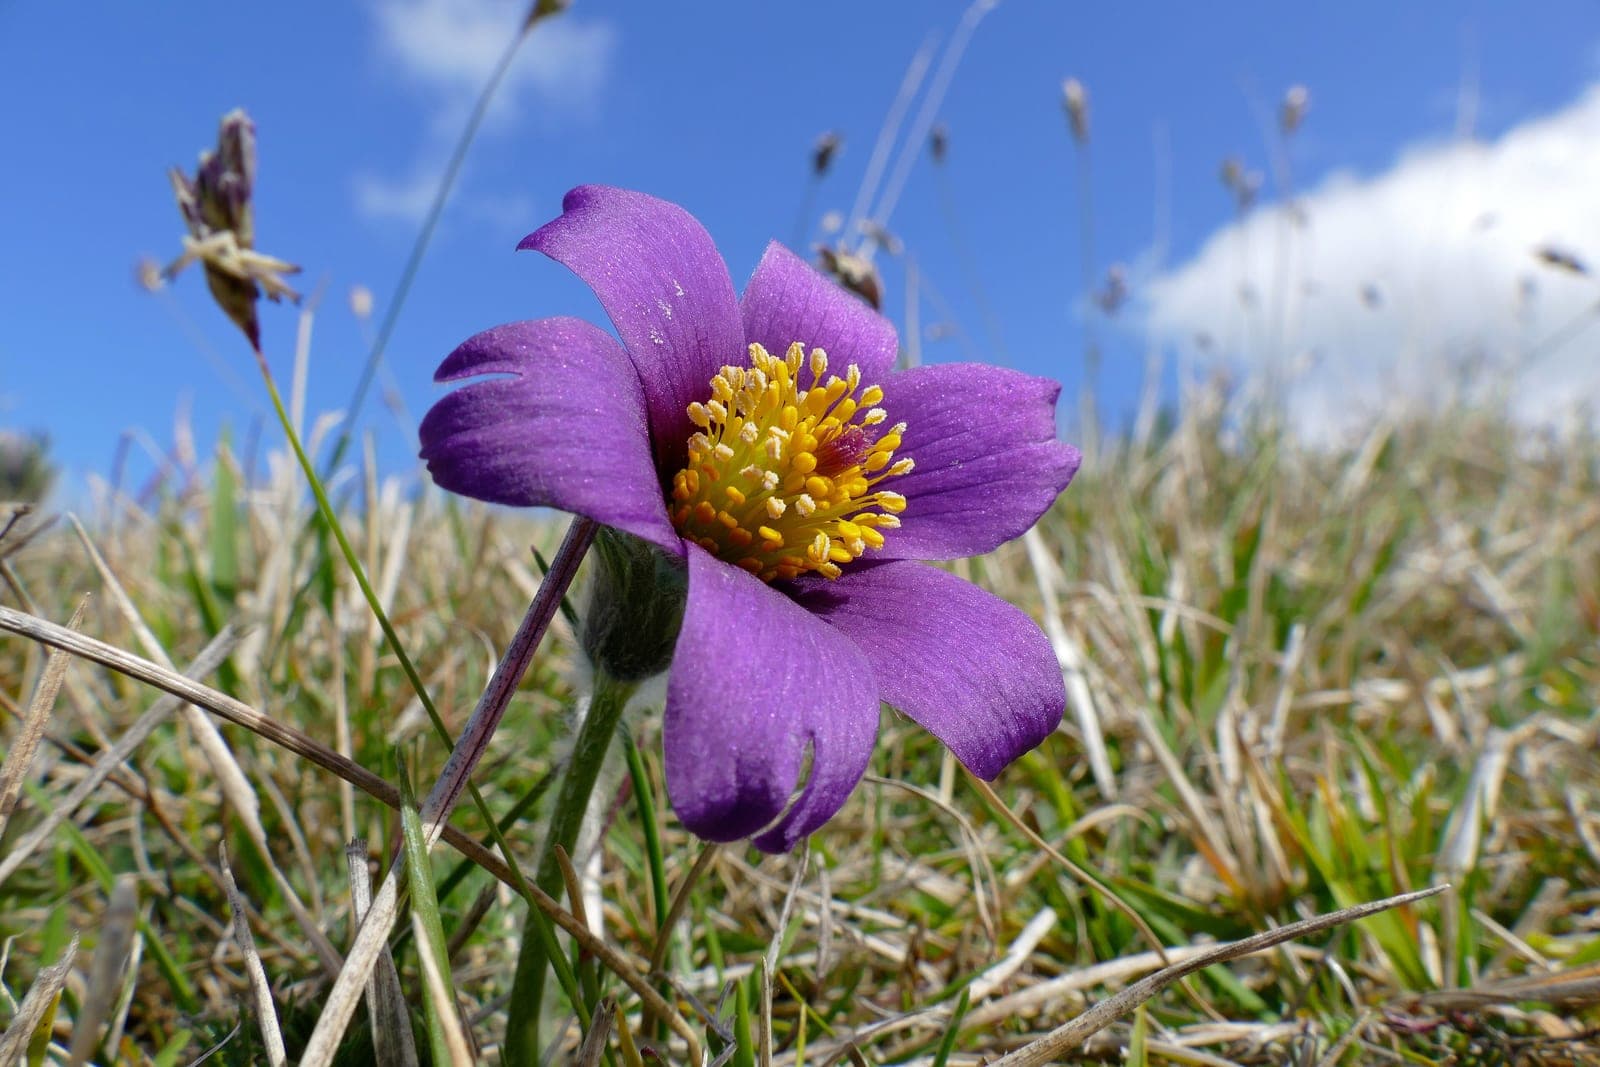
Pasqueflower
Gritty, well-drained, alkaline soil.

Sweet William
Fertile, well-drained, neutral to slightly alkaline soil. Resents wet feet.
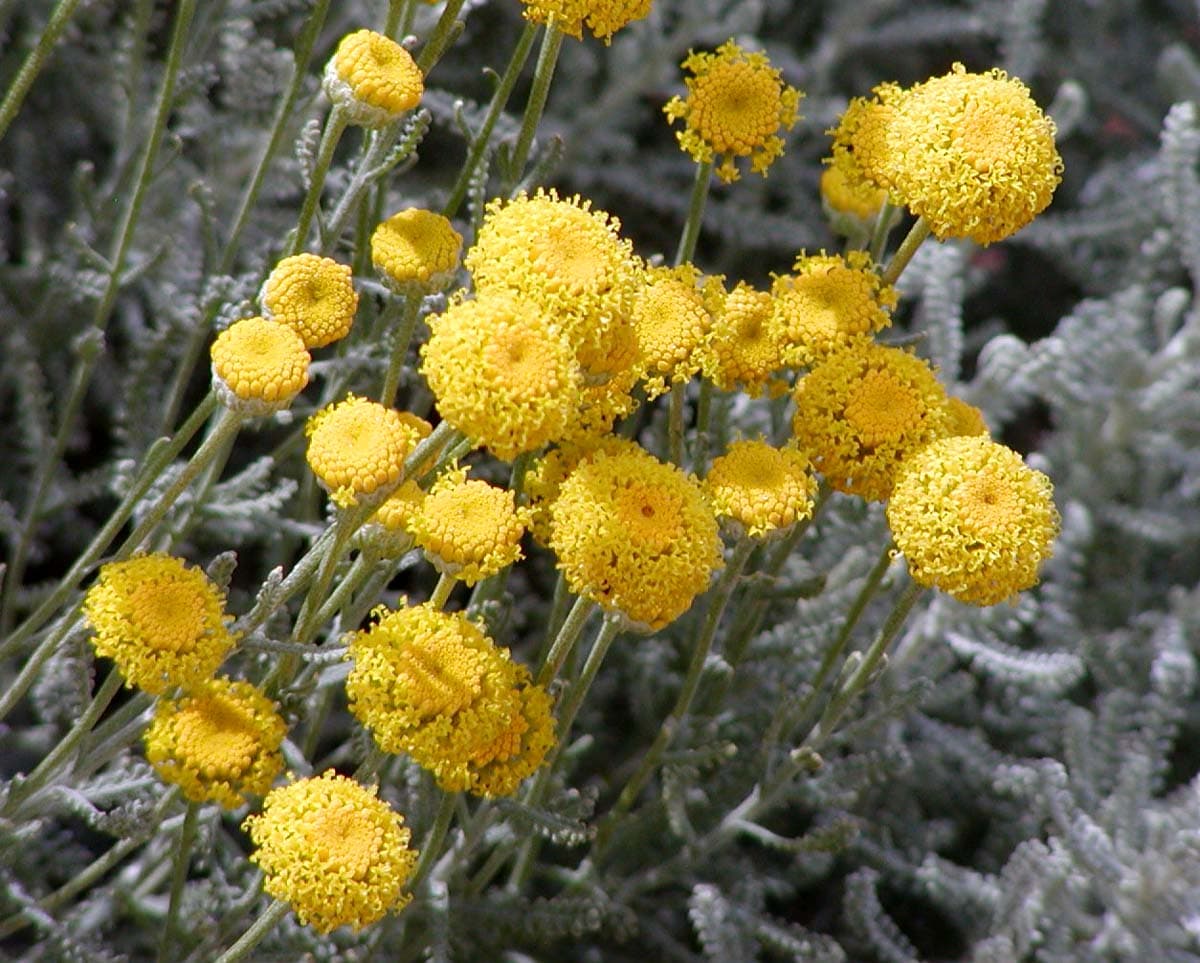
Santolina
Lean, well-drained soil, and tolerates poor and alkaline ground.
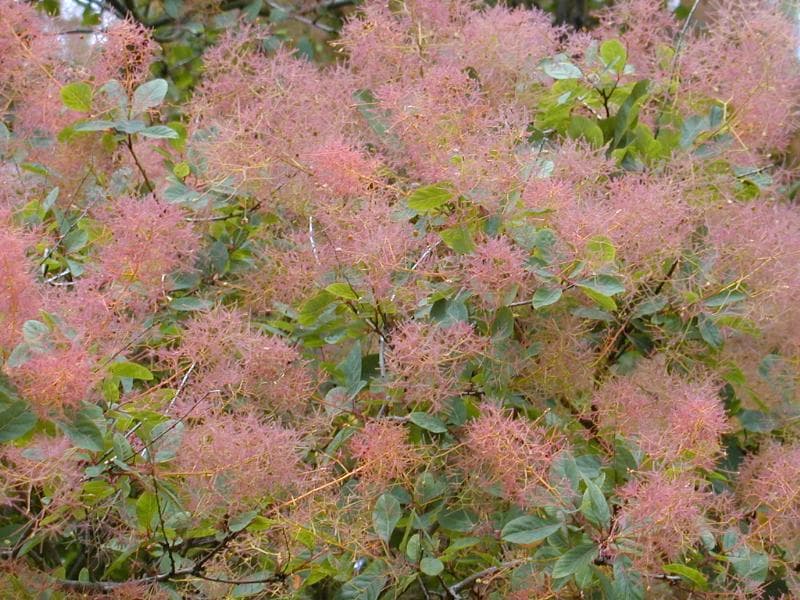
Smoketree
Lean, well drained, and tolerates dry, rocky, alkaline soil.
For acid soil: raise pH
Ground limestone (calcitic)
Raises pHCalcium carbonate. Neutralises acidity slowly and supplies calcium.
Use it when
Soil is acid and the test says magnesium is fine. Apply in fall so it has months to work.
Watch for
It barely moves down, so mix it into the top few inches. Clay needs more than sand to shift the same amount.
Dolomitic limestone
Raises pHCalcium and magnesium carbonate. Raises pH the same way and adds magnesium.
Use it when
Soil is acid and the test shows low magnesium.
Watch for
Skip it if magnesium is already high, since it can tip the balance against calcium.
Hydrated (slaked) lime
Raises pHActs within days, much faster than ground limestone.
Use it when
Rarely. Only when the lab report specifically calls for it.
Watch for
Caustic to skin and roots, and easy to overshoot. We'd use ground limestone instead.
Wood ash
Raises pHRaises pH and supplies potassium and some calcium. It has no nitrogen.
Use it when
Soil is acid, the test shows low potassium, and you have clean ash from untreated wood.
Watch for
Strong and easy to overdo. Keep it away from acid-lovers and from potatoes, which scab in alkaline soil. Never use ash from treated wood, coal, or charcoal briquettes.
For alkaline soil: lower pH
Elemental sulfur
Lowers pHSoil bacteria convert it to sulfuric acid. It is the most reliable lasting acidifier.
Use it when
Soil is alkaline and plants need it lower, such as blueberries. Apply the season before planting.
Watch for
It works over months, and only in warm, moist soil. Follow the lab rate, since heavy doses can burn roots.
Iron sulfate
Lowers pHActs faster than sulfur, but the pH shift is modest. It also supplies iron.
Use it when
Acid-lovers are yellowing from iron deficiency, or you're topping up a small bed.
Watch for
Stains paving and clothing. Too costly and weak for changing a large bed.
Aluminum sulfate
Lowers pHAcidifies on contact and makes aluminum available to the plant.
Use it when
Only to turn hydrangea flowers blue.
Watch for
Aluminum builds up and can burn roots. It's not a general acidifier.
Ammonium sulfate
Lowers pHA nitrogen fertiliser that acidifies as soil microbes convert the ammonium.
Use it when
As the regular feed for blueberries and other acid-lovers.
Watch for
It adds salts, and heavy use burns plants. It's a feed that happens to acidify, not a soil fix.
Sphagnum peat moss
Lowers pHStrongly acid, with a pH around 3.5 to 4.5, and holds water.
Use it when
In a blueberry planting hole, or in potting mix for acid-lovers.
Watch for
The effect is temporary and local. Peat is harvested from bogs and isn't renewable, so use it sparingly.
Pine bark and pine needles
Lowers pHMildly acidic and slowly acidify the surface as they break down.
Use it when
As mulch for acid-lovers, to help keep pH down.
Watch for
The effect is small. It maintains a low pH but won't correct a high one.
Structure and fertility, no pH change
Compost
No pH changeAdds organic matter, nutrients, and life, and buffers pH toward neutral.
Use it when
Almost always, on any bed, acid or alkaline.
Watch for
Spread an inch or two on top. Don't expect it to fix a pH problem.
Leaf mold
No pH changeHolds water and improves structure, with little nutrient. Neutral to slightly acid.
Use it when
Sandy soil that drains too fast, or heavy soil that needs opening up.
Watch for
It takes six months to two years to make.
Aged manure
No pH changeAdds nitrogen, phosphorus, and organic matter.
Use it when
Hungry crops in beds that need building up.
Watch for
Fresh manure burns plants and carries pathogens. Use only well-composted manure, and ask the supplier about herbicide residue.
Worm castings
No pH changeA gentle, balanced feed that improves soil biology.
Use it when
As a top-dress for containers, seedlings, and small beds.
Watch for
Expensive for large areas, and compost does most of the same job.
Biochar
No pH changeCharcoal that holds water and nutrients for decades. Many types are alkaline.
Use it when
Sandy soil that can't hold water or nutrient. Mix it with compost first.
Watch for
Raw biochar pulls nutrients out of the soil until it's charged. Many types raise pH, so it's a poor choice in an already alkaline bed.
Gypsum
No pH changeCalcium sulfate. Adds calcium and sulfur without raising pH.
Use it when
Calcium is low and you don't want to raise pH, or the soil is salty with sodium.
Watch for
It doesn't loosen ordinary clay, despite the claim. It only helps sodium-heavy soils.
Rock phosphate
No pH changeA slow phosphorus source.
Use it when
Phosphorus is low and the soil is acid, below about pH 6, where plants can take it up.
Watch for
Useless in neutral or alkaline soil. Release takes years.
Bone meal
No pH changePhosphorus and calcium.
Use it when
Only when the test shows phosphorus is low. Most garden soils already have plenty.
Watch for
The smell attracts squirrels and other diggers. Excess phosphorus washes into waterways.
Greensand
No pH changeA slow potassium source with trace minerals.
Use it when
The test shows low potassium and you want a gentle, slow source.
Watch for
Release is slow, and wood ash or potash is faster where potassium is truly low.
Epsom salts
No pH changeMagnesium sulfate.
Use it when
Only for a proven magnesium deficiency, shown by a soil test.
Watch for
It doesn't change pH, and it won't help a plant that isn't short of magnesium.
Popular, but they don’t do much
Coffee grounds don't acidify
Used grounds are close to neutral. They're a fine addition to the compost pile, and they won't move your pH.
Vinegar is a bad idea
It acidifies for a few days at most, then the soil bounces back. It damages soil life and roots in the meantime.
Baking soda doesn't fix acid soil
It raises pH briefly and adds sodium, which damages soil structure. Use limestone.
Eggshells are a very slow limestone
They do contain calcium carbonate, but they break down so slowly that the effect on pH is negligible. Add them to compost for the calcium, not for the pH.
Telling normal from dangerous
Most fungus in a garden is doing a job. Judge by the plant, not the mushroom: a healthy plant with mushrooms nearby is fine, and a declining plant with a fungus at its base is not.
Normal, and usually helpful
White threads in mulch or compost
Fine white or grey webbing running through mulch is mycelium, the body of a decomposer fungus. It means the mulch is breaking down. Leave it alone; it is not harming anything.
Mushrooms popping up in mulch or lawn
A mushroom is the fruiting body of a fungus that is feeding on dead wood or organic matter in the soil. They appear after rain and last a few days. They don't mean your plants are sick. Knock them over or leave them.
Slime mold
Yellow, orange, or white scrambled-egg blobs on mulch, sometimes called dog vomit. It is not a fungus and not a pathogen; it feeds on bacteria and dries to a crust within days. Rake it up or hose it off.
Bird's nest and artillery fungi
Bird's nest fungus looks like tiny cups of eggs in mulch. Artillery fungus shoots black specks onto nearby siding and cars, and the specks are hard to scrub off. Neither harms plants. If artillery fungus is a problem, keep fresh wood mulch away from walls.
Mycorrhizae you never see
Most of the fungus in a healthy bed is invisible, living on and around roots and trading nutrients and water for sugars. This is the fungus you are building when you stop tilling.
Worth acting on
Honey fungus (Armillaria)
Clusters of honey-coloured mushrooms at the base of a tree or shrub in fall, black bootlace-like strands in the soil, and white fans of fungus under the bark near the ground. It kills woody plants and persists in soil for years. Remove affected plants and as much root as you can, and don't replant the same host there.
Wilt and root rot
A plant that wilts while the soil is wet, with brown, mushy roots, is usually root rot (often a water mold rather than a true fungus). One-sided wilting or yellowing, with brown streaks inside a cut stem, points to a wilt like Verticillium or Fusarium. Both live in the soil. Fix drainage, don't overwater, and choose resistant plants for that spot.
Southern blight
A mat of white fungus at the soil line of a stem, with tiny tan seed-like balls in it, in hot, humid weather. The plant collapses. Pull it with the soil around it and bag it. Don't compost it.
Anything attacking the plant itself
Powdery coatings, spots, rust-coloured pustules, or fuzzy grey mould on leaves and stems are plant diseases, not soil fungi, and are handled by airflow, spacing, and clearing infected debris. The plant's own page covers the ones it's prone to.
A safety note
Never eat a wild mushroom from the garden, and don't rely on a photo to identify one. Some common lawn and mulch species are poisonous, and a few are deadly. If children or dogs use the garden, pull mushrooms as they appear and bag them.
Make the stuff the bed runs on
Compost is decomposition you manage. A bin or a pile turns kitchen and garden waste into the best amendment there is, and costs nothing but a little attention.
How to compost
The basic recipe
Layer or mix about two to three parts browns to one part greens, by volume. Keep it as damp as a wrung-out sponge. Air matters as much as the mix, so build on bare ground, not a slab, and fluff it now and then.
Hot or cold
A pile at least three feet across and three feet high, turned every week or two, heats to 130 to 160 degrees and finishes in a couple of months. A smaller or unturned pile is a cold pile: it takes six to twelve months and doesn't get hot enough to kill weed seed reliably.
What goes in
Fruit and vegetable scraps, coffee grounds, eggshells, leaves, straw, grass clippings, spent plants, and weeds that haven't set seed. Shred or chop big pieces, since small pieces break down faster.
What stays out
Meat, dairy, and oils attract rodents. Dog and cat waste carries pathogens. Diseased plants, seeding weeds, and perennial weed roots only belong in a pile that really gets hot. Leave out glossy paper and treated wood.
Fixing a pile that's off
A sour or ammonia smell means too wet or too many greens: add browns and turn it. A dry pile that sits there needs water and some greens. A pile that won't heat is usually too small, too dry, or all browns.
When it's done
Finished compost is dark, crumbly, and smells like a forest floor, and you can't pick out what went in. Sift out the chunks and put them back in the pile. Spread an inch or two on top of a bed rather than digging it in.
Worms
Earthworms come on their own
Stop tilling, keep the soil covered, and add organic matter, and earthworms show up. Their tunnels carry air and water down, and their castings are rich in nutrients. Buying and releasing them doesn't help; they leave if the soil isn't right.
A bin of worms
Red wigglers, which are a different species from garden earthworms, turn kitchen scraps into castings in a bin on a porch or under a sink. Give them moist, shredded cardboard or newspaper for bedding, bury scraps in it, and keep them between about 55 and 77 degrees. Harvest castings after three to six months.
Watch for jumping worms
Asian jumping worms are invasive in much of North America. They thrash and flip when handled, leave soil that looks like coffee grounds, and have a smooth, pale band that circles the body flush with it. They spread in mulch, compost, and potted plants. Don't use them in compost or share soil. Seal them in a bag and put it in the trash.
Keep worms out of the woods
In forests that never had earthworms, they strip the leaf layer that native plants depend on. Don't dump bait worms or compost worms in the woods.
Making potting mix
Potting mix is not garden soil
Garden soil packs down in a pot, drains poorly, and brings weeds and disease with it. Containers need a light mix that holds water and air at once.
The basic mix
Equal parts by volume: peat moss or coco coir for moisture, perlite or pumice for air, and finished compost for nutrients. Moisten everything before you mix, and wear a dust mask. Coir is the common alternative to peat; rinse it and soak it first.
Seed-starting mix
Leave the compost out and use a finer blend of coir or peat with perlite or vermiculite. Compost can carry pathogens that rot seedlings. Sieved leaf mold can stand in for part of the peat.
Cactus and succulents
Mix equal parts potting mix and grit, such as pumice or coarse sand. Sharp drainage matters more than richness.
Refresh each year
Potting mix breaks down and compacts. Tip it out each spring, break up the root mass, and blend in fresh compost and some new mix before you refill.
Not sure which compost bin suits your garden?
Bin type, size, and placement depend on how much you produce, how much space you have, and how much turning you’ll actually do. We’ll look at your yard with you and set one up that gets used.
Leaf mold, mulch, and chop and drop
Everything that falls in a garden is a resource. What matters is what you do with it and how thick you lay it.
Leaves
Leaves are free mulch
A tree pulls minerals up from deep in the soil and drops them in its leaves. Raking them away sends the trees' work to the curb. Mow over them to shred them and spread two to three inches on beds. Whole leaves, especially oak and beech, mat down and shed water.
Leaf mold
Leaf mold is leaves rotted slowly by fungi, not heat. Pile them in a wire cage or bag them damp in black bags with a few holes, and leave them. Shredded leaves take six to twelve months, whole leaves a year or two. The result is dark and crumbly, with little nutrient but a great deal of water-holding power.
Using it
Spread leaf mold as mulch, dig it into heavy or sandy soil, or sift it into seed-starting mix as a peat substitute.
Leave some for the insects
Fallen leaves shelter overwintering bees, butterflies, moths, and fireflies. Leave them under shrubs and in the back of beds, and wait to tidy until spring has really settled in. Thick whole-leaf layers smother lawn, so shred those or move them.
Chop and drop, or mulch
Chop and drop
Cut plants where they grow and leave the pieces on the soil. Cover crops, cut-back perennials, comfrey, and weeds that haven't seeded all work. It returns nutrients in place, costs nothing, and brings in no seed or contaminants. The layer is thin and breaks down fast, so it feeds the soil more than it suppresses weeds.
Mulch
Material brought in from elsewhere (wood chips, bark, straw, compost, leaves) and laid thick. It lasts a season or more, blocks light, and holds moisture. It costs money or effort, and straw, hay, and cheap compost can bring in weed seed or lingering herbicide, so ask the supplier.
How they differ
Chop and drop is fast, free, and feeds the soil, but doesn't last. Mulch is slow, durable, and does the weed control. Greens rot fast and can turn to slime in a thick layer, while browns last. Neither replaces the other.
Using both
Lay mulch on the bed and chop and drop on top of it as the season goes: spent plants, spring cutbacks, and weeds pulled before seeding. Don't chop and drop diseased plants or runner weeds like bindweed, which will take root again.
Find out where the water goes
Soggy soil rots roots and soil that drains too fast starves them. Test before you plant, because a drainage problem is much easier to fix in an empty bed.
The hole test
Dig a hole a foot wide and a foot deep and fill it with water. Let it drain, then fill it again and time the second fill. About an inch an hour is about right. Under half an inch an hour is a problem, and faster than six inches an hour is sand that will dry out.
Watch it after rain
Puddles that last a day mean poor drainage, and a spot that stays soggy in spring will rot roots by midsummer. Walk the garden after a heavy rain and note where water sits and where it runs.
Fixing slow drainage
Add organic matter over the whole bed, not just the planting hole. Raise the bed. Or choose plants that like wet feet. Compaction is a common cause: skip the wheelbarrow across the bed, don't work wet soil, and loosen with a fork rather than a tiller.
Don't add sand or gravel
Sand mixed into clay can make something like concrete. A layer of gravel at the bottom of a hole or pot doesn't help either; water stops at the change in texture and pools above it. Amend the whole bed, or build up.
Fixing fast drainage
Sandy soil holds little water or nutrient. Compost and a thick mulch both slow it down. Group the thirstiest plants where you can reach them and let drought-tolerant plants have the dry corners.
Water deeply, not often
An inch a week from rain or hose is a rough baseline, delivered in one or two soakings rather than a daily sprinkle. Deep watering sends roots down; shallow watering keeps them at the surface. A drip line makes it automatic.
Put plants that want the same thing together
A bed is easy to look after when everything in it likes the same conditions. Group by water, sun, and soil first, and by looks second.
Group by what plants need
Put plants with the same water, sun, and soil needs together. A bed of drought-tolerant plants on one schedule works. Mix a thirsty plant into it and one of them will always be wrong.
Water zones
Think of the bed in zones: a wet corner by the downspout or at the low spot, a middle that gets normal water, and a dry edge by a wall or at the top of a slope. Place plants in the zone they suit, and put the thirstiest ones nearest the hose.
Soil needs travel together
Acid-lovers like blueberries go in one place, where you can keep the pH low. Lavender and other lean-soil plants go together, away from rich, wet beds. Heavy feeders such as dahlias and roses go in the richest ground.
Plant to mature size
Space by the width on the plant's page, not the width on the nursery tag. A bed looks sparse the first year and fills in the second. Fill the gaps with annuals rather than crowding the perennials.
Plant in drifts
Odd numbers (three, five, seven) of the same plant read better than singles scattered around. Repetition ties a bed together, and dense plantings shade out weeds.
Don't plant grocery-store garlic
Supermarket garlic is often treated to stop it sprouting, may carry soil diseases such as white rot, and was grown for another climate. Buy seed garlic from a grower or garden supplier, and plant it in fall.
Tall at the back, or the middle
In a bed against a fence, tall plants go at the back. In an island bed, tall goes in the middle. Leave room to reach in without stepping on the soil.
Build up when you can't dig down
A raised bed gives you a layer of good soil on top of whatever is underneath. Size it for your reach, fill it well, and expect to top it up.
When they're worth it
Raised beds help where soil is poor, contaminated, compacted, or drains badly, where you're building over grass, or where you want to garden without bending. On good, well-drained soil they are optional.
Width and height
Keep beds three to four feet wide so you can reach the middle from either side. Eight to twelve inches deep suits most plants, and six is the minimum on loosened ground. Go to fifteen or more for root crops over bad soil or for accessibility.
Paths
Leave two to three feet between beds, wide enough for a wheelbarrow. Mulch the paths thickly so the weeds that come in don't reach the beds.
Materials
Untreated cedar or redwood lasts years. Galvanized steel, stone, and brick last longer. Avoid railroad ties and anything treated with older arsenic-based preservatives. Don't line the sides with plastic, which traps water against the wood.
What goes inside
Put cardboard on the grass underneath, then fill with a mix of about two-thirds topsoil and one-third compost. Bagged raised-bed mix works for small beds. For larger beds, buy by the cubic garden: length times width times depth, in feet, divided by 27.
How they behave
Raised beds warm earlier in spring, drain faster, and dry out faster in summer, so they need more water than in-ground beds. The soil settles a few inches in the first year. Top it up with compost each spring.
Four ways to clear a bed, and none of them is a tiller
Smothering and cutting both leave the soil structure alone. Sheet mulching is the one we reach for, and fall is the time to start it.
Sheet mulching
Mow the grass as low as you can. Overlap sheets of plain cardboard (tape and staples removed) by six inches, wet them down, and cover with four to six inches of wood chips or compost. Planting holes can be cut straight through.
Takes
Three to six months, or a full season
Best for
Most beds. The best method, and best started in fall
Drawback
Needs a good supply of cardboard and mulch
Tarping
Mow low and cover with a heavy black tarp, weighted at the edges so no light gets in. Leave it in place until the grass underneath is brown and dead.
Takes
Six to eight weeks in warm weather, longer in cool
Best for
Large areas, when you want no mulch at all
Drawback
Leaves bare soil and a dead mat. Plastic isn't pretty or reusable forever
Solarizing
Like tarping, but with clear plastic, which traps sunlight and cooks the soil surface. Bury the edges so heat stays in.
Takes
Four to eight weeks in the hottest part of summer
Best for
Hot, sunny climates and flat sites that get full sun
Drawback
Unreliable in cool or cloudy regions
Cutting sod
Slice under the turf with a flat spade, or rent a sod cutter for a large area, and roll up or lift the pieces. You can plant right away.
Takes
A day or two
Best for
A bed you need to plant now
Drawback
Removes an inch or two of topsoil with it. Heavy work. Stack sod upside down to rot, or use it elsewhere
Whichever you choose
Don't rototill
Tilling chops rhizomatous grasses like Bermuda and quackgrass into a hundred pieces, each of which regrows, and it buries and then raises a fresh crop of weed seed. Smothering and sod-cutting leave the soil intact.
Tough grasses need more
Bermuda, quackgrass, and zoysia spread by underground runners. Use two layers of cardboard and a longer wait, and don't plant until a dug-up test patch shows no live roots.
Check before you plant
Lift a corner of the cardboard or tarp. If any green grass is left, give it more time. The cardboard should be soft and breaking down, with the sod underneath dead and rotting.
Edge the bed
Cut a trench six inches deep along the edge, or install an edging strip, to stop grass creeping back in. Re-cut it every spring.
Pull them properly, then need to pull fewer
Weeding well means getting the root and doing it early. Weeding less means giving weeds nowhere to start.
Proper weeding
Know what you're pulling
Annual weeds are shallow and come out easily, and the job is to get them before they flower. Perennial weeds have deep roots or runners and return if any piece is left. Check the weeds page if you aren't sure, and check that a seedling isn't one of your own plants first.
Weed after rain
Soil that's damp releases roots whole. Dry soil snaps them. If it hasn't rained, water the bed the evening before.
Get the whole root
Pull low, close to the crown, with a steady pull and not a jerk. A dandelion weeder or hori-hori gets taproots out intact. If the root snaps, dig for it.
Dig runners; don't pull them
Bindweed, quackgrass, and creeping Charlie come back from any fragment. Loosen the soil with a fork, lift the root mass out, and shake it clean without letting it fall back on the bed.
Hoe the annuals
On a dry, sunny day, slide a sharp hoe just under the surface to slice seedlings off. They dry out where they lie. Don't dig deeper than an inch or you'll bring up new seed. I like the Japanese gardening hoe specifically for this purpose.
Deal with what you pulled
Weeds that haven't set seed and have no runners can go in the compost. Anything seeding, and any perennial roots, go in the trash or soak in a bucket of water for several weeks before composting.
Little and often
Ten minutes a few times a week beats an afternoon a month. A seedling is a one-second job; a flowering weed is a project.
Strategies that cut the work
Mulch two to three inches deep
Light is what wakes most weed seeds, and mulch blocks it. Wood chips, shredded leaves, or compost all work. Keep it a few inches off stems and trunks. Go thinner where you want self-sowers to seed.
Don't leave bare soil
Bare ground is a vacancy, and something will fill it. Plant close, use groundcovers between larger plants, or cover empty beds with mulch or a cover crop.
Disturb the soil less
Every digging brings buried seed to the surface, and a bed holds years of it. A bed you don't dig grows fewer weeds each year. See the natural lawn guide for cover-crop timing.
The stale seedbed
Prepare the bed, water it, and wait two to three weeks for the weeds to sprout. Hoe them off shallowly, then plant or sow without digging again. You've used up a flush of seed before your plants are in the ground.
Water the plant, not the bed
Drip lines and soaker hoses put water at the roots and leave the soil between plants dry, which holds back weeds. Overhead sprinklers water everything.
Never let them seed
One weed gone to seed can drop thousands. Cutting or pulling flowers before the seed ripens is the single most useful habit. Perennial weeds give in if you keep cutting the tops, because the roots run out of stored energy.
Pick your battles
A few harmless volunteers in a thick planting aren't a problem. Spend effort on the aggressive ones: runners, thorny weeds, and anything about to seed.
Looking for something?
Let us know and we will add it to the list for your garden plan.