
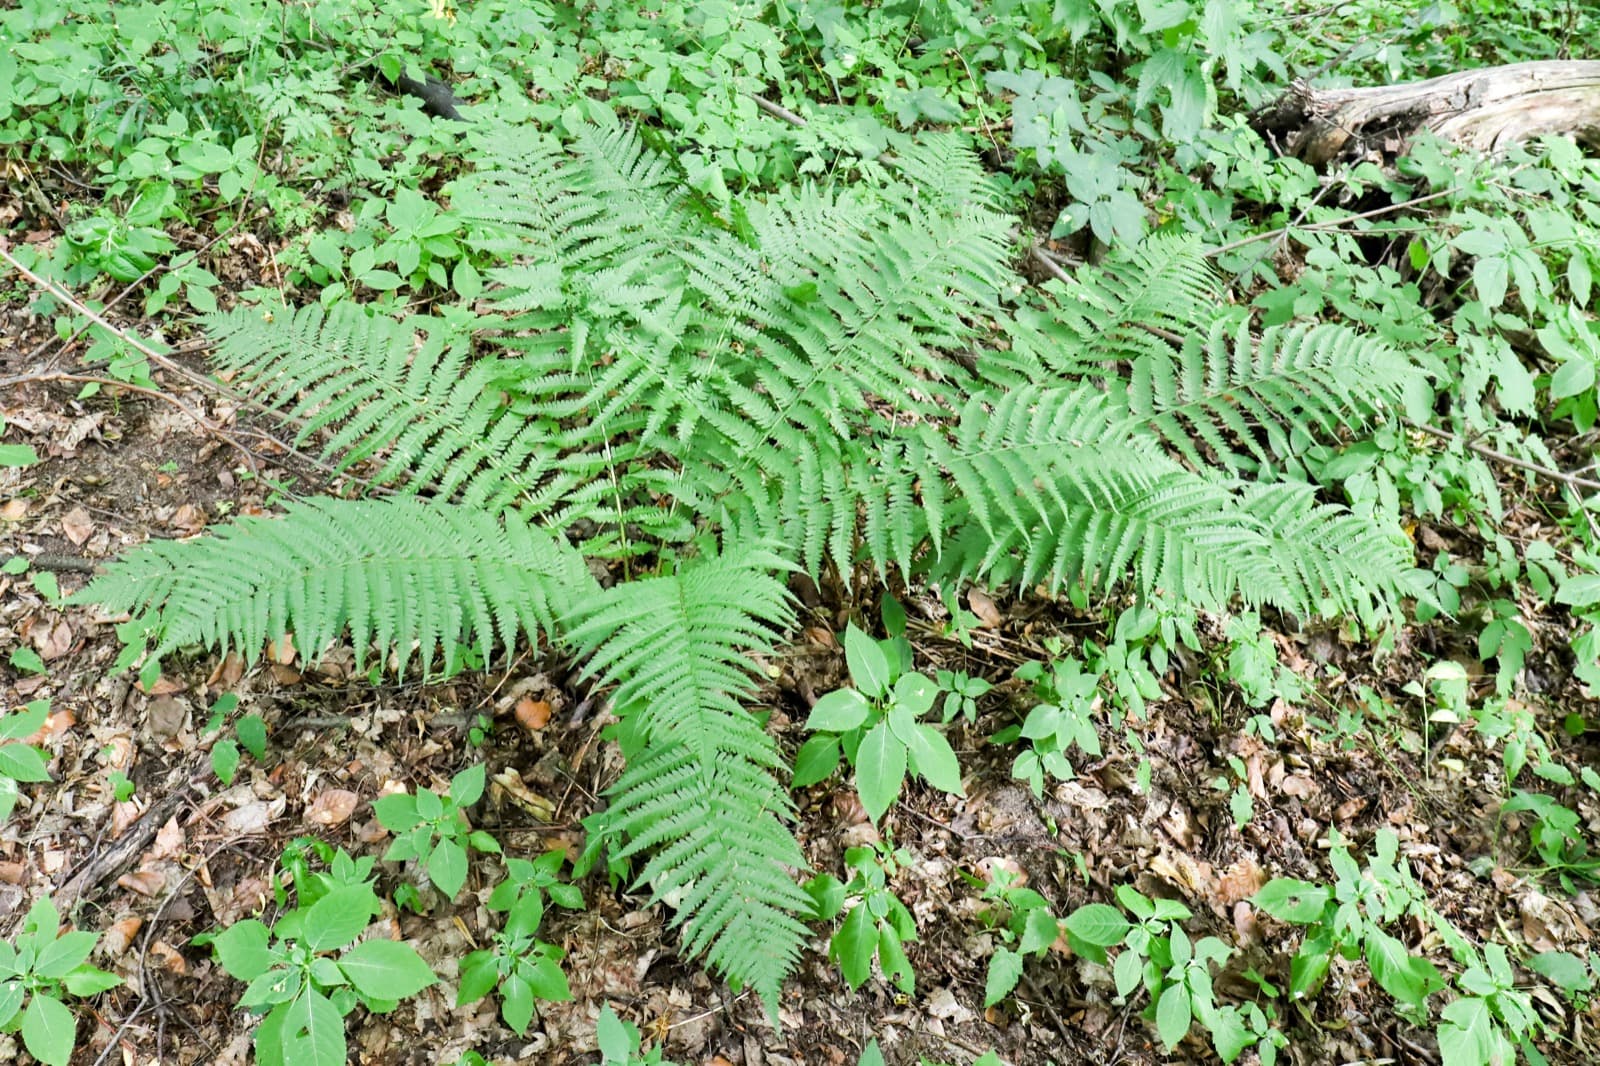
Male fern is a large, robust fern native across temperate Europe, Asia, and North America. Its arching, bipinnate fronds emerge from a stout, scaly rhizome and form a vase-shaped clump reaching 2–4 feet tall. It is one of the most adaptable and garden-worthy woodland ferns available in zones 4–8, valued primarily for its bold, reliable foliage in difficult shaded spots.
In the wild it colonizes damp woodland understory, shaded hedge banks, rocky screes, and stream margins. Fronds are fully deciduous in zones 4–6 and semi-evergreen in zones 7–8. It performs best in consistently moist, humus-rich, slightly acidic soil with reasonable drainage; a generous layer of leaf-mold mulch helps maintain moisture and soil structure. Clumps expand slowly by rhizome and are long-lived with minimal intervention.
The rhizome was used for centuries as an anthelmintic to expel tapeworms and other intestinal parasites. Extracts known as aspidium oleoresin were listed in the US and British Pharmacopoeias through much of the 20th century. The active compounds - phloroglucinol derivatives including filicin - are effective against intestinal worms but toxic in excess, and the practice has been replaced by safer modern drugs.
Ecoregions:Northwestern Forested MountainsGreat PlainsNorth American Deserts
Male Fern sets spores, not seed.
Slower than seed, and it asks for cleanliness rather than skill. The payoff is numbers - one ripe frond carries more spores than you could ever use. Timings below are estimated for zone 6B.
- 1
Wait for the sori to darken
0–10 weeks before first frost≈ Aug 23 – Nov 1 for youDo this now
Turn a frond over. The spore cases sit in rows along the underside and ripen from pale green through rust to near-black. Green is too early. Once they look dusty and shed at a touch, they are ready - a day either side matters more than the month, and species vary by weeks.
- 2
Collect onto paper
0–10 weeks before first frost≈ Aug 23 – Nov 1 for youDo this now
Cut a ripe frond and lay it face down on white paper somewhere still, out of any draught. Leave it overnight. You want the fine brown dust underneath, not the chaff - tip the sheet and the spores stay put while the debris slides off. Fold them into a paper envelope, cool and dry.
- 3
Sterilise the medium
Any time before sowing
Spores are slow and defenceless, and anything else in the pot will outrun them. Use a soilless mix, peat or coir with perlite, and bake it at 180F for half an hour. Cool it, then moisten. This is the step people skip and the reason most attempts end in mould.
- 4
Surface sow, and give them light
Sow within a few months of collecting
Scatter thinly across the damp surface and leave them uncovered - spores need light to germinate, so burying them ends it. Cover the container to hold humidity and keep it in bright indirect light at 65 to 75F. Mist rather than water.
- 5
Green film first, fronds much later
2 to 4 weeks after sowing
A green film spreads across the surface. That is not a fern yet - it is the prothallus, the gametophyte generation, carrying both sets of organs. Fertilisation needs a film of water for the sperm to swim through, so the surface has to stay damp through this stage or nothing crosses.
- 6
Prick out at an inch
Roughly 2 to 4 months after sowing
True fronds push up through the green mat. When a clump reaches about an inch, lift it with a fork into its own small pot. Hold the humidity another month, then open the cover a little at a time - dry air kills more sporelings than anything else.
- 7
Move them outside
2–8 weeks after last frost≈ Apr 24 – Jun 5 for you
Into shade and damp ground once several true fronds are up. A first-year sporeling is small enough to lose under a leaf, so give it somewhere you will remember to look.
Sporelings resent drying out far more than being crowded. When in doubt, leave the cover on longer.
Foliar Nematode
Brown, water-soaked lesions bounded by veins on fronds, spreading progressively from the crown upward. Affected tissue dries to tan or dark brown. Damage can resemble drought or scorch but follows vein boundaries distinctly.
Remove and destroy affected fronds immediately; do not compost. Avoid overhead irrigation, which spreads nematodes through water films on foliage. No curative chemical option is practical in home gardens. Improve air circulation and keep foliage dry. Severely infested clumps should be dug and discarded.
Root rot
Plants wilt, yellow, and stunt even in moist soil; lower stems and roots turn brown, soft, and mushy and the plant may collapse. Most common in heavy, wet, or poorly drained ground.
Improve drainage and stop overwatering, and never plant too deep. Lift and destroy badly affected plants along with the soil around the roots. Grow in raised or free-draining beds to prevent it returning.
Fungal leaf spot
Brown or purplish spots on the leaves, often ringed with a yellow halo, that spread and merge in warm, humid, or wet weather; heavily spotted leaves yellow and drop early.
Pick off spotted leaves and clear fallen debris to remove overwintering spores. Improve air circulation by thinning, and water at the base so foliage dries quickly. If it persists, apply a copper- or sulfur-based fungicide at the first sign.