
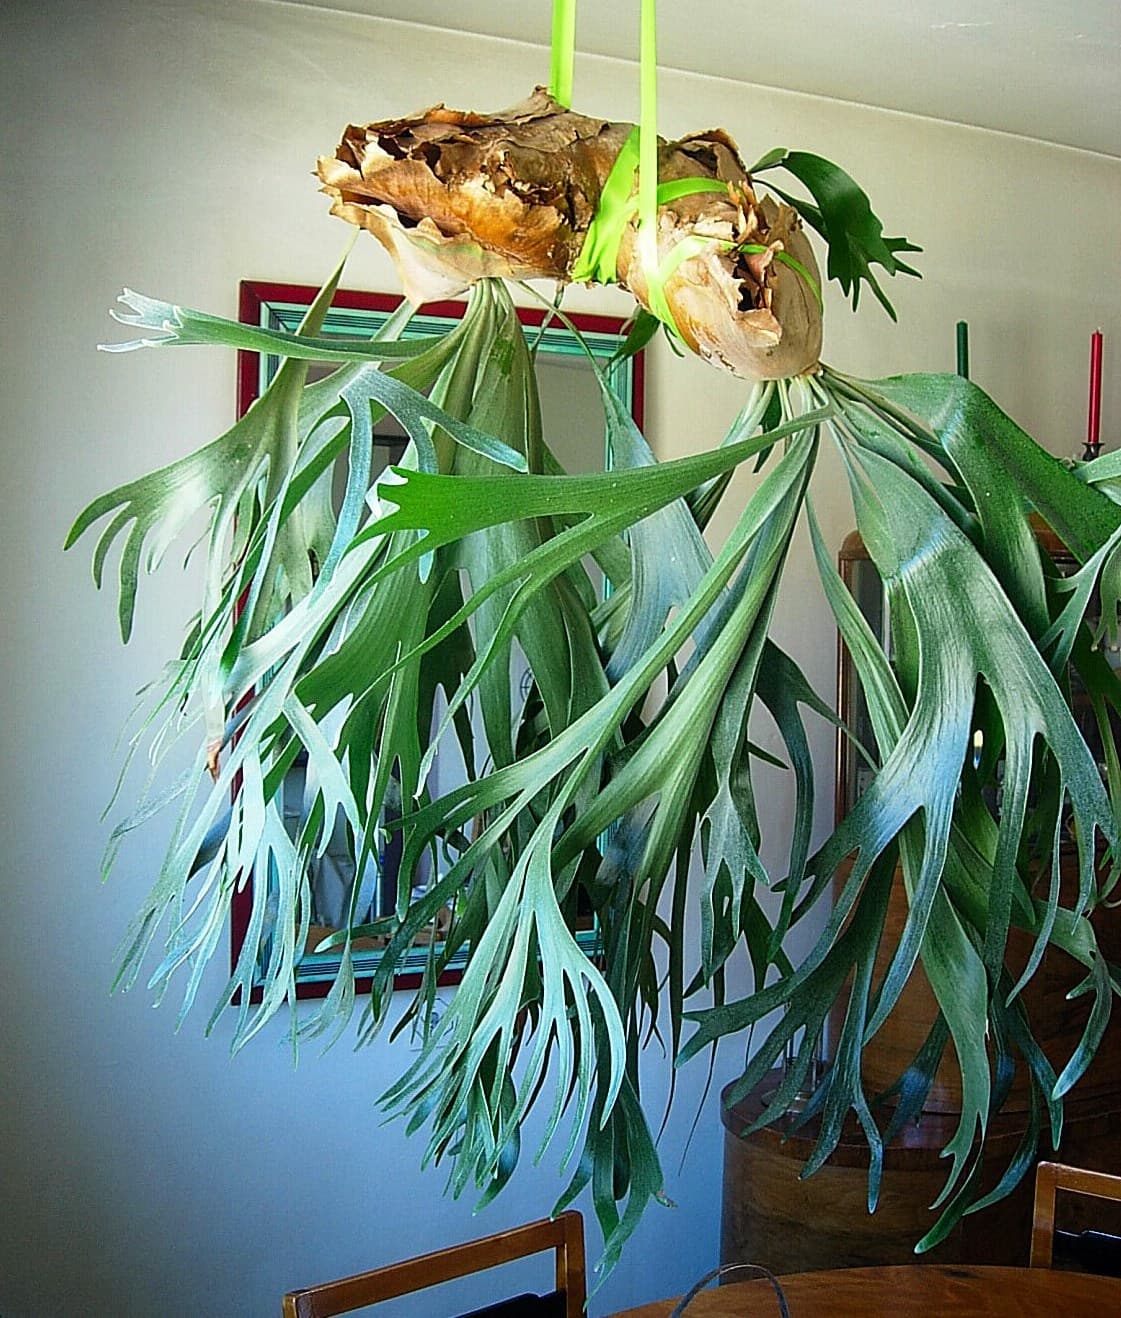
Platycerium bifurcatum is an epiphytic fern native to the east coast of Australia, where it grows anchored to tree bark rather than rooted in soil. Indoors, it is prized for its dramatic, forked fronds that resemble deer or elk antlers, and it is most often displayed mounted on a wooden board, nestled in a hanging basket, or arranged as a living wall piece. Its architectural form makes it one of the more visually striking plants a person can keep inside.
The key to keeping a staghorn fern healthy indoors is replicating the conditions it experiences as an epiphyte: bright filtered light, high ambient humidity, and a root environment that drains fast and dries between waterings. The most common mistake is overwatering - leaving the mounting medium permanently wet quickly leads to root rot. Misting the fronds is also widely misused as a substitute for proper watering; it does little for the roots. Aim to keep humidity above 50 percent using a humidifier or by grouping plants, and water by soaking the root mass rather than spritzing the leaves.
Staghorn ferns produce two distinct frond types. The flat, rounded shield fronds at the base turn brown and papery with age - this is normal and protective, not a sign of decline, and they should never be removed. The forked, antler-like fronds are where active growth occurs. Small offsets called pups emerge from the base over time and can be separated and mounted independently once they have formed their own shield frond.
Bright indirect light means positioning the plant near a window - within a few feet - where it receives strong ambient light but no direct sun on its fronds, which can cause bleaching or scorching. In too little light, the antler fronds grow slowly, stay small, and may pale; too much direct sun dries and bleaches them quickly.
Feed with a diluted balanced fertiliser
Wipe the shield fronds gently; never polish them or remove the brown shield fronds
Check for scale and mealybugs under the fronds
Remount or move to a larger mount when the shield fronds outgrow it
Soak the whole mount in water for 10–15 minutes, then let it drain
Staghorn Fern sets spores, not seed.
Slower than seed, and it asks for cleanliness rather than skill. The payoff is numbers - one ripe frond carries more spores than you could ever use. Timings below are estimated for zone 6B.
- 1
Wait for the sori to darken
0–10 weeks before first frost≈ Aug 23 – Nov 1 for youDo this now
Turn a frond over. The spore cases sit in rows along the underside and ripen from pale green through rust to near-black. Green is too early. Once they look dusty and shed at a touch, they are ready - a day either side matters more than the month, and species vary by weeks.
- 2
Collect onto paper
0–10 weeks before first frost≈ Aug 23 – Nov 1 for youDo this now
Cut a ripe frond and lay it face down on white paper somewhere still, out of any draught. Leave it overnight. You want the fine brown dust underneath, not the chaff - tip the sheet and the spores stay put while the debris slides off. Fold them into a paper envelope, cool and dry.
- 3
Sterilise the medium
Any time before sowing
Spores are slow and defenceless, and anything else in the pot will outrun them. Use a soilless mix, peat or coir with perlite, and bake it at 180F for half an hour. Cool it, then moisten. This is the step people skip and the reason most attempts end in mould.
- 4
Surface sow, and give them light
Sow within a few months of collecting
Scatter thinly across the damp surface and leave them uncovered - spores need light to germinate, so burying them ends it. Cover the container to hold humidity and keep it in bright indirect light at 65 to 75F. Mist rather than water.
- 5
Green film first, fronds much later
2 to 4 weeks after sowing
A green film spreads across the surface. That is not a fern yet - it is the prothallus, the gametophyte generation, carrying both sets of organs. Fertilisation needs a film of water for the sperm to swim through, so the surface has to stay damp through this stage or nothing crosses.
- 6
Prick out at an inch
Roughly 2 to 4 months after sowing
True fronds push up through the green mat. When a clump reaches about an inch, lift it with a fork into its own small pot. Hold the humidity another month, then open the cover a little at a time - dry air kills more sporelings than anything else.
- 7
Move them outside
2–8 weeks after last frost≈ Apr 24 – Jun 5 for you
Into shade and damp ground once several true fronds are up. A first-year sporeling is small enough to lose under a leaf, so give it somewhere you will remember to look.
Sporelings resent drying out far more than being crowded. When in doubt, leave the cover on longer.